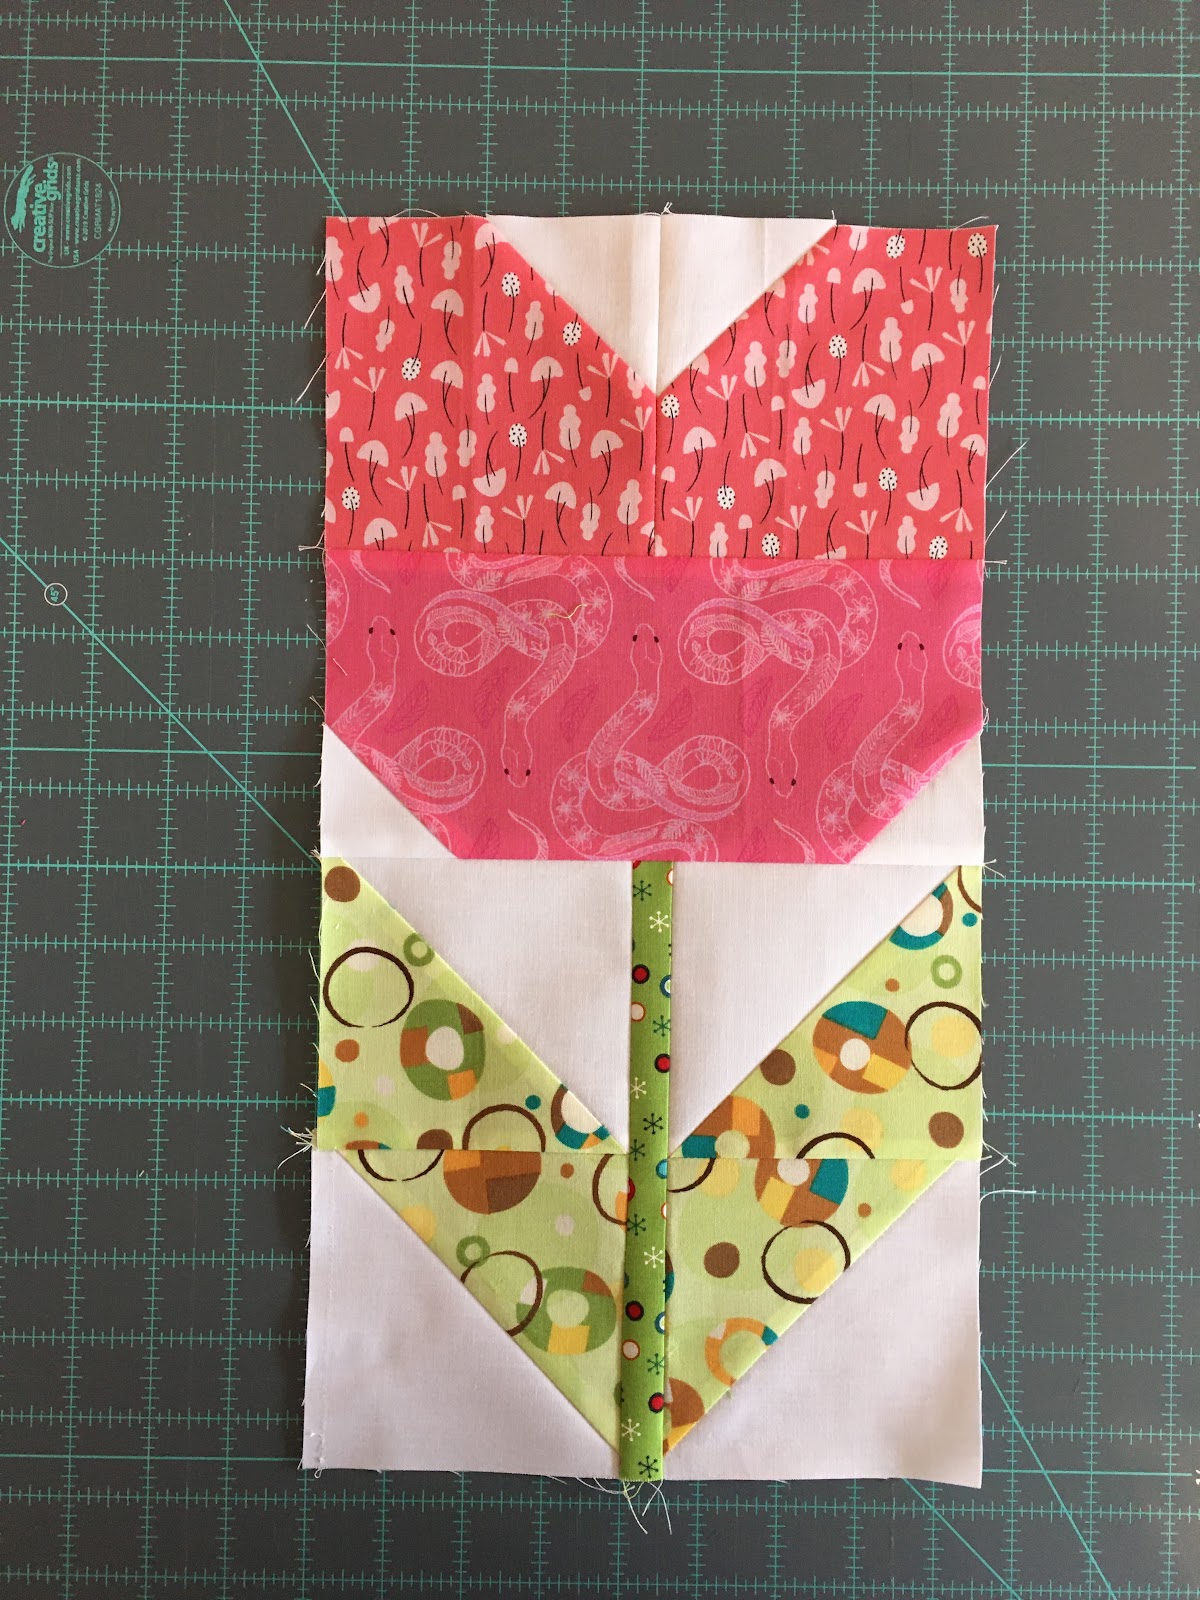
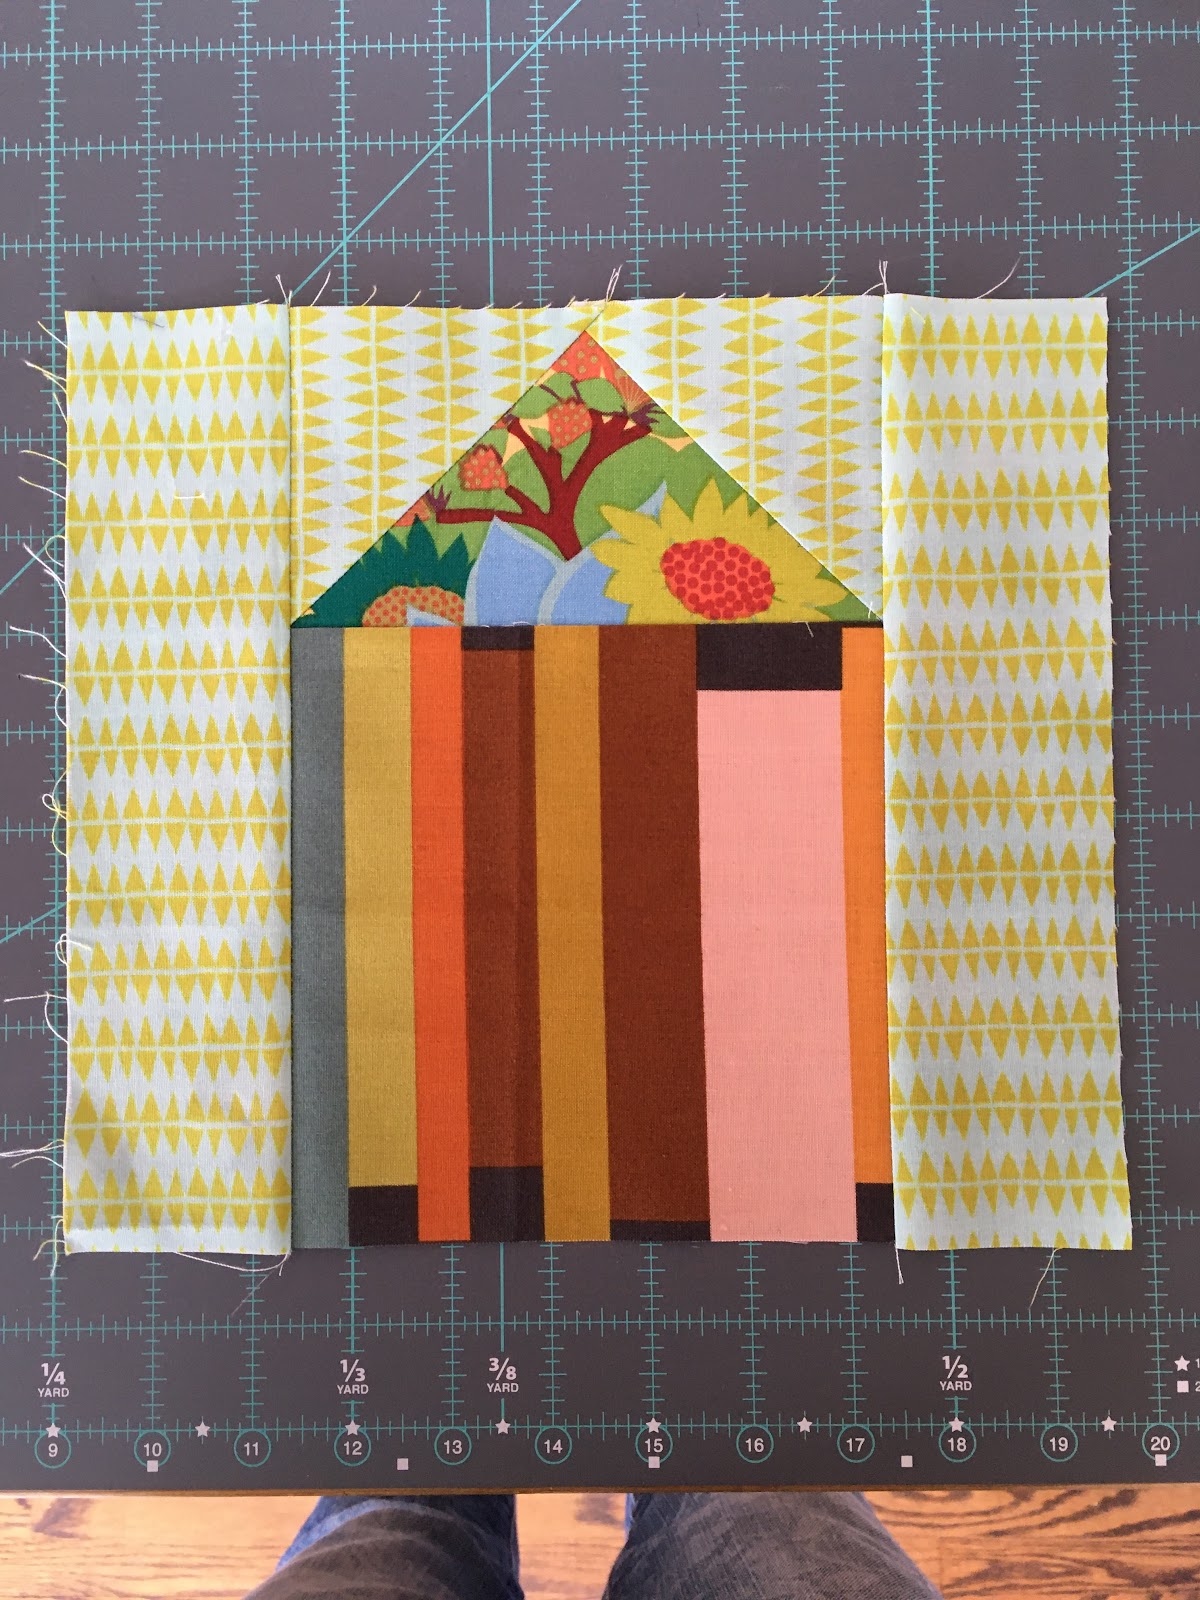
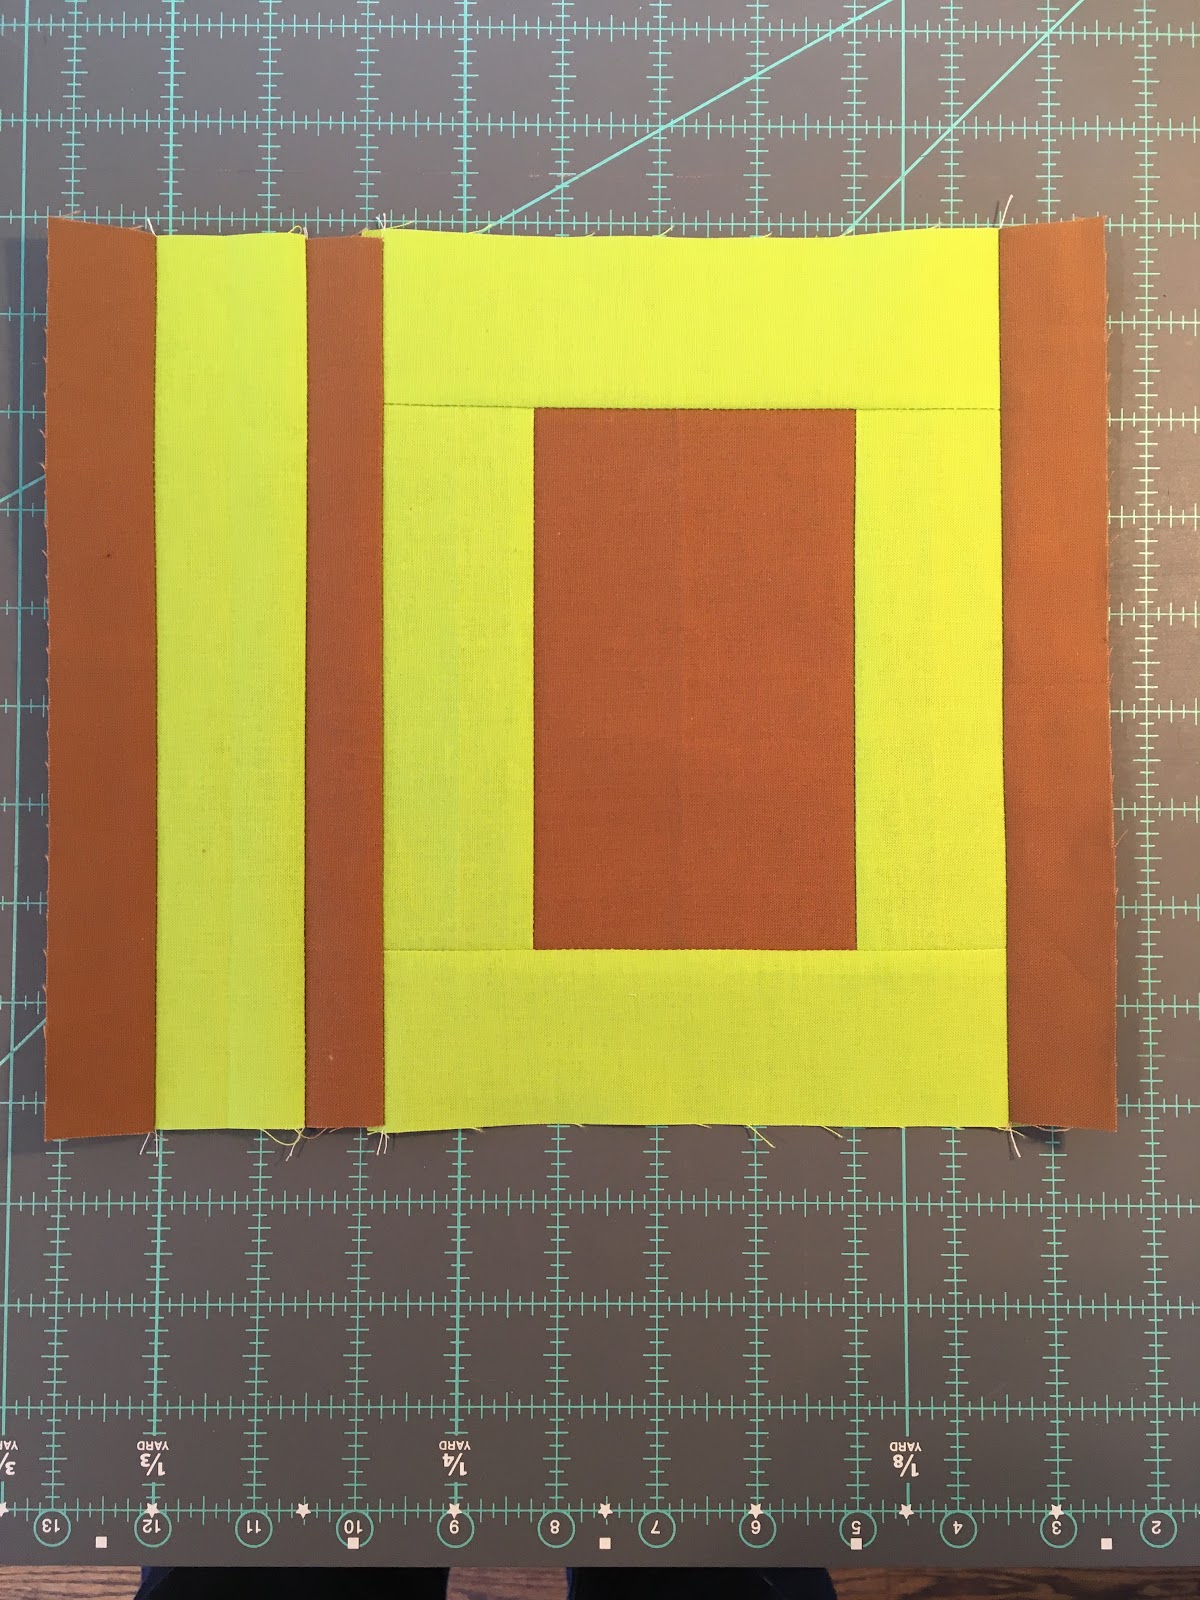
Analytics

Monday 22 April 2024

April Block of the Month

 Tulip Time!

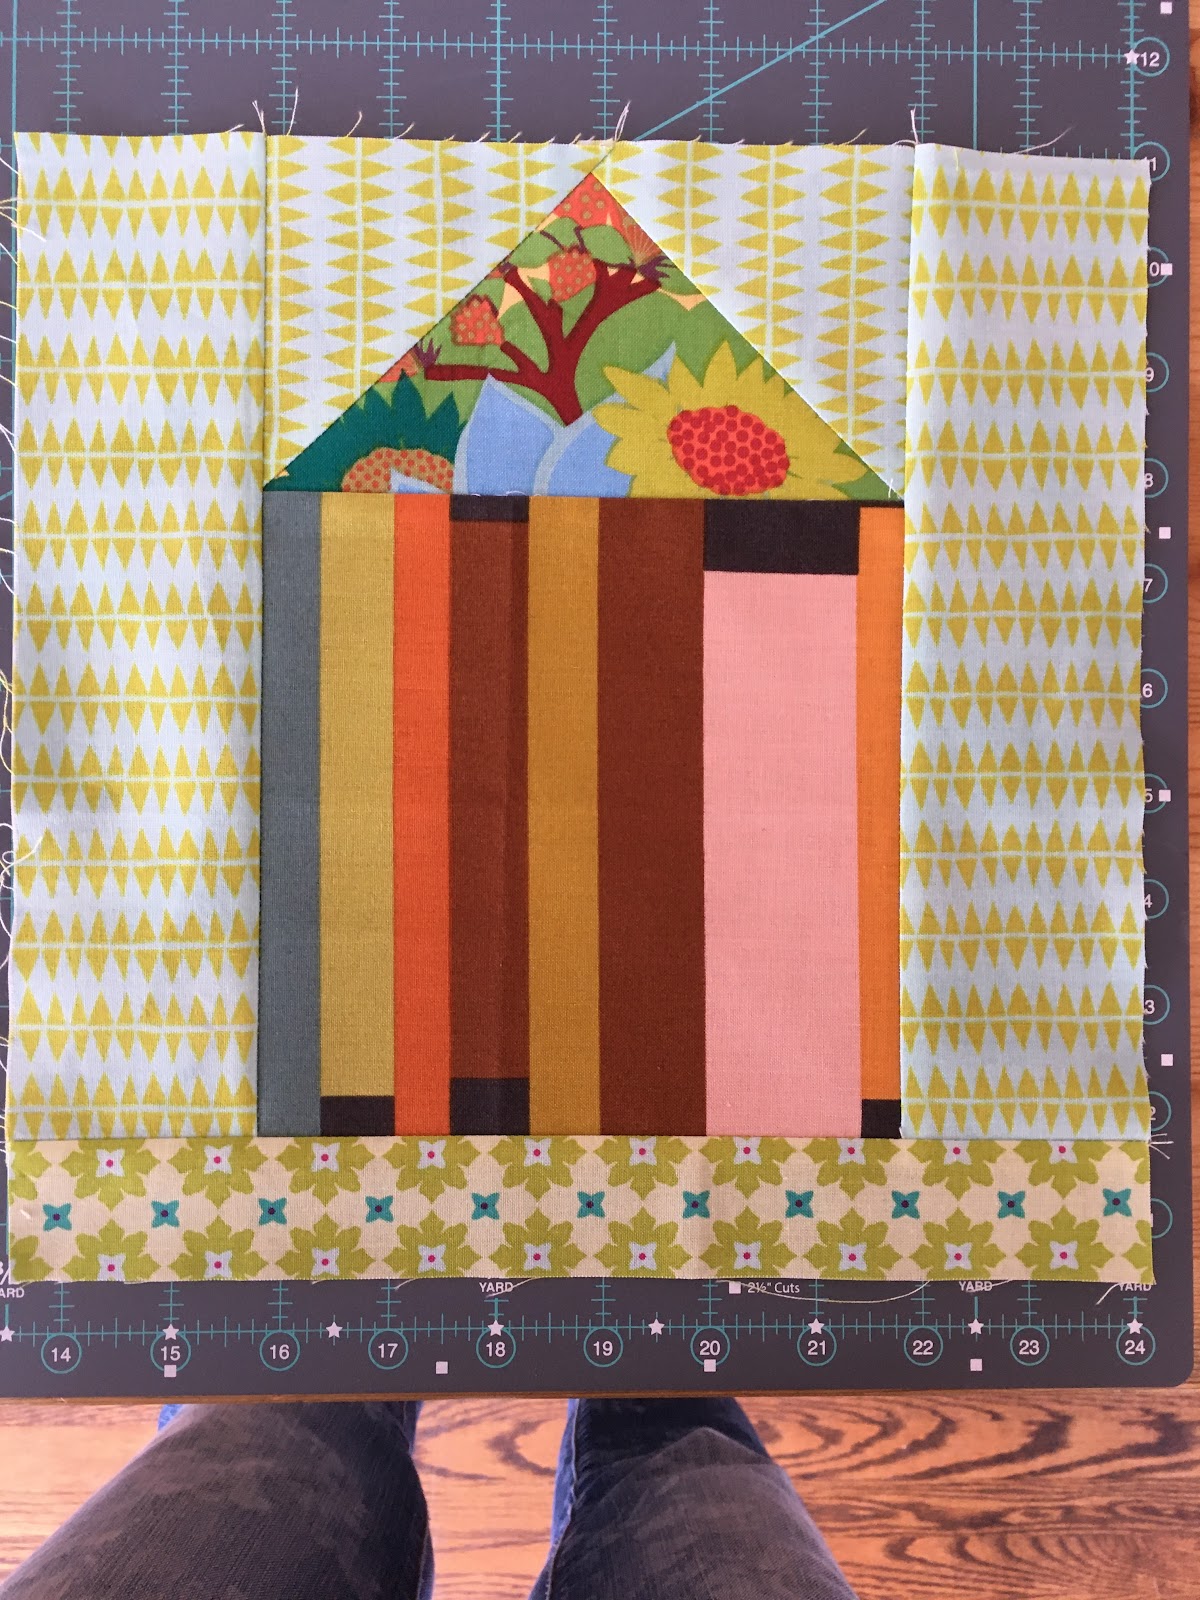
This month’s block has nothing to do with the number 10.  To celebrate spring, we’re taking a break from our regularly scheduled Tenth Anniversary Block of the Month programming to celebrate an iconic spring bulb here in Ottawa, the tulip! Based on the Amsterdam Quilt, a free project from Cloud Nine Fabrics, we’ll make super sized, scrappy blooms.
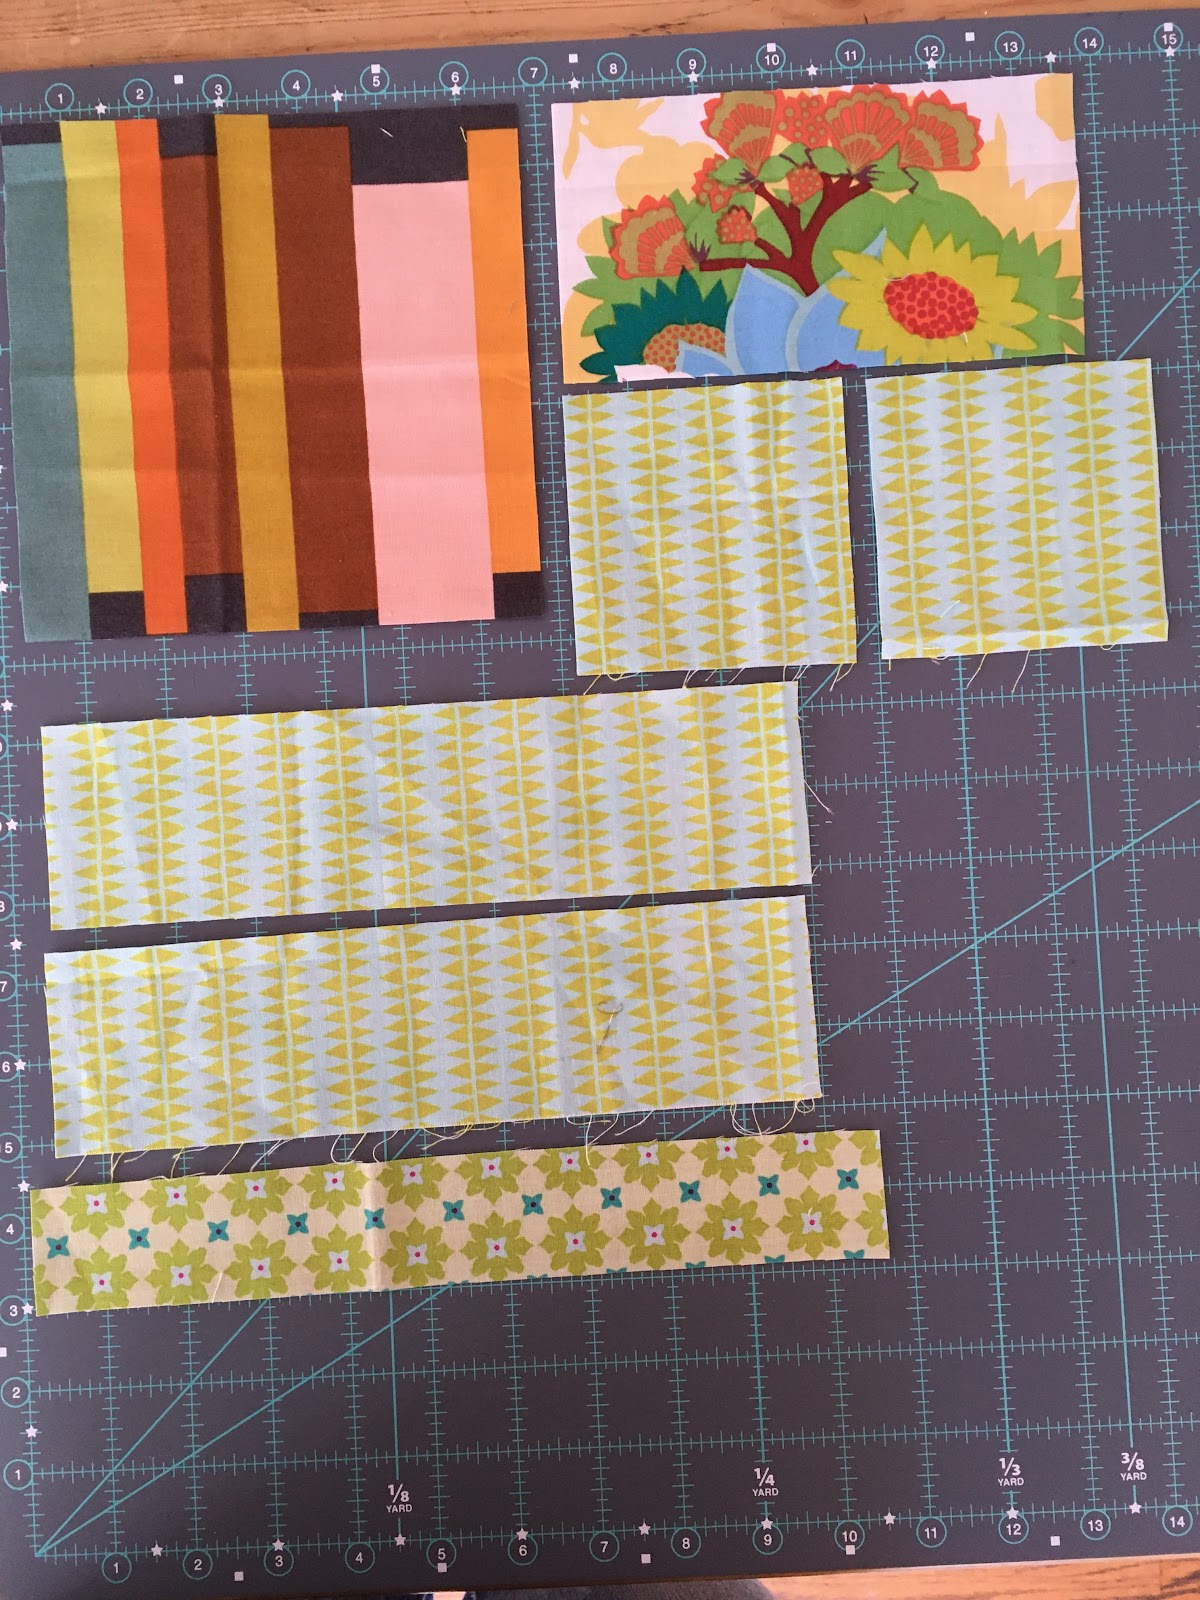

Fabrics  

For the tulips - two different main fabrics (prints or solids) in the same warm colour (yellow, orange, red, peach or pink)

For the leaves - green print or solid

For the stem - a different green print or solid

For the background - white solid


Cutting instructions 

Tulip Top

2 - 4.5” squares from one main fabric

2 - 2.5” squares white

Tulip Bottom

1 - 4.5” x 8.5” rectangle in second main fabric

2 - 2” squares white

Leaves 

2 - 5” squares green print or solid

2 - 5” squares white

Stem

1 - 1” x 8” rectangle in a different green print or solid than the leaves


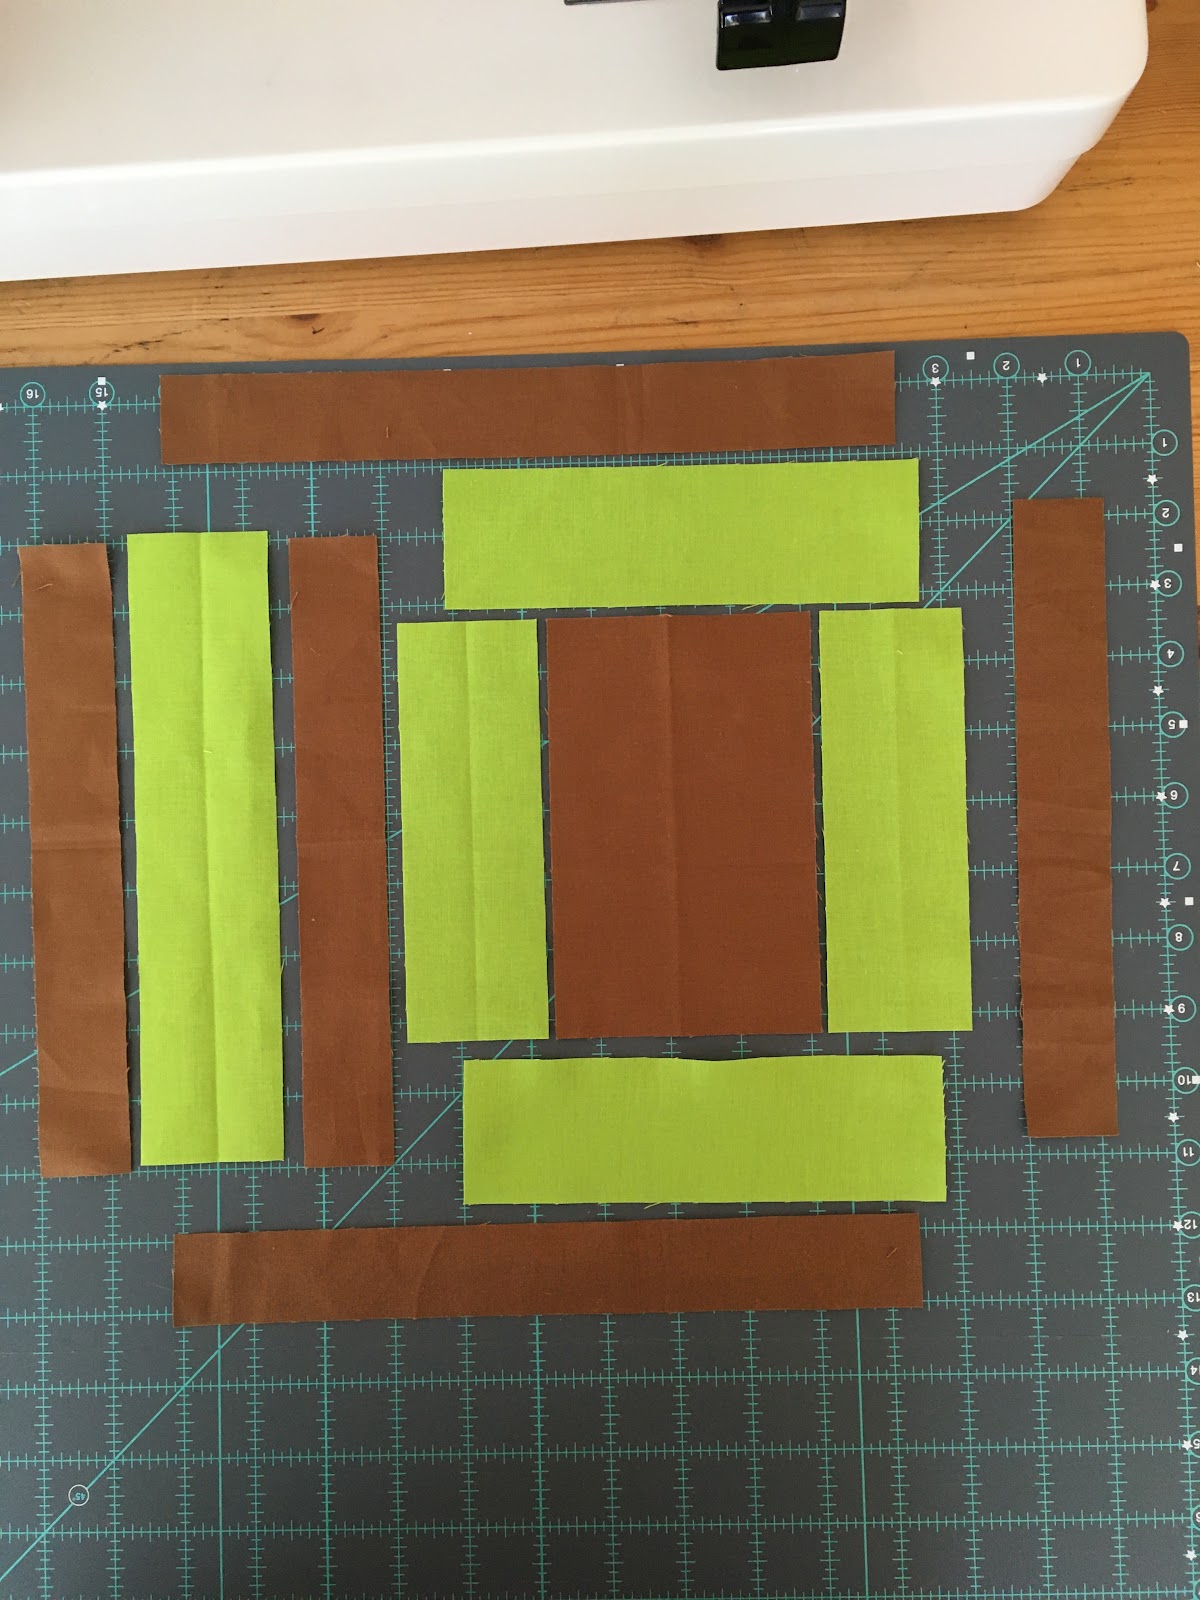
Assembly instructions
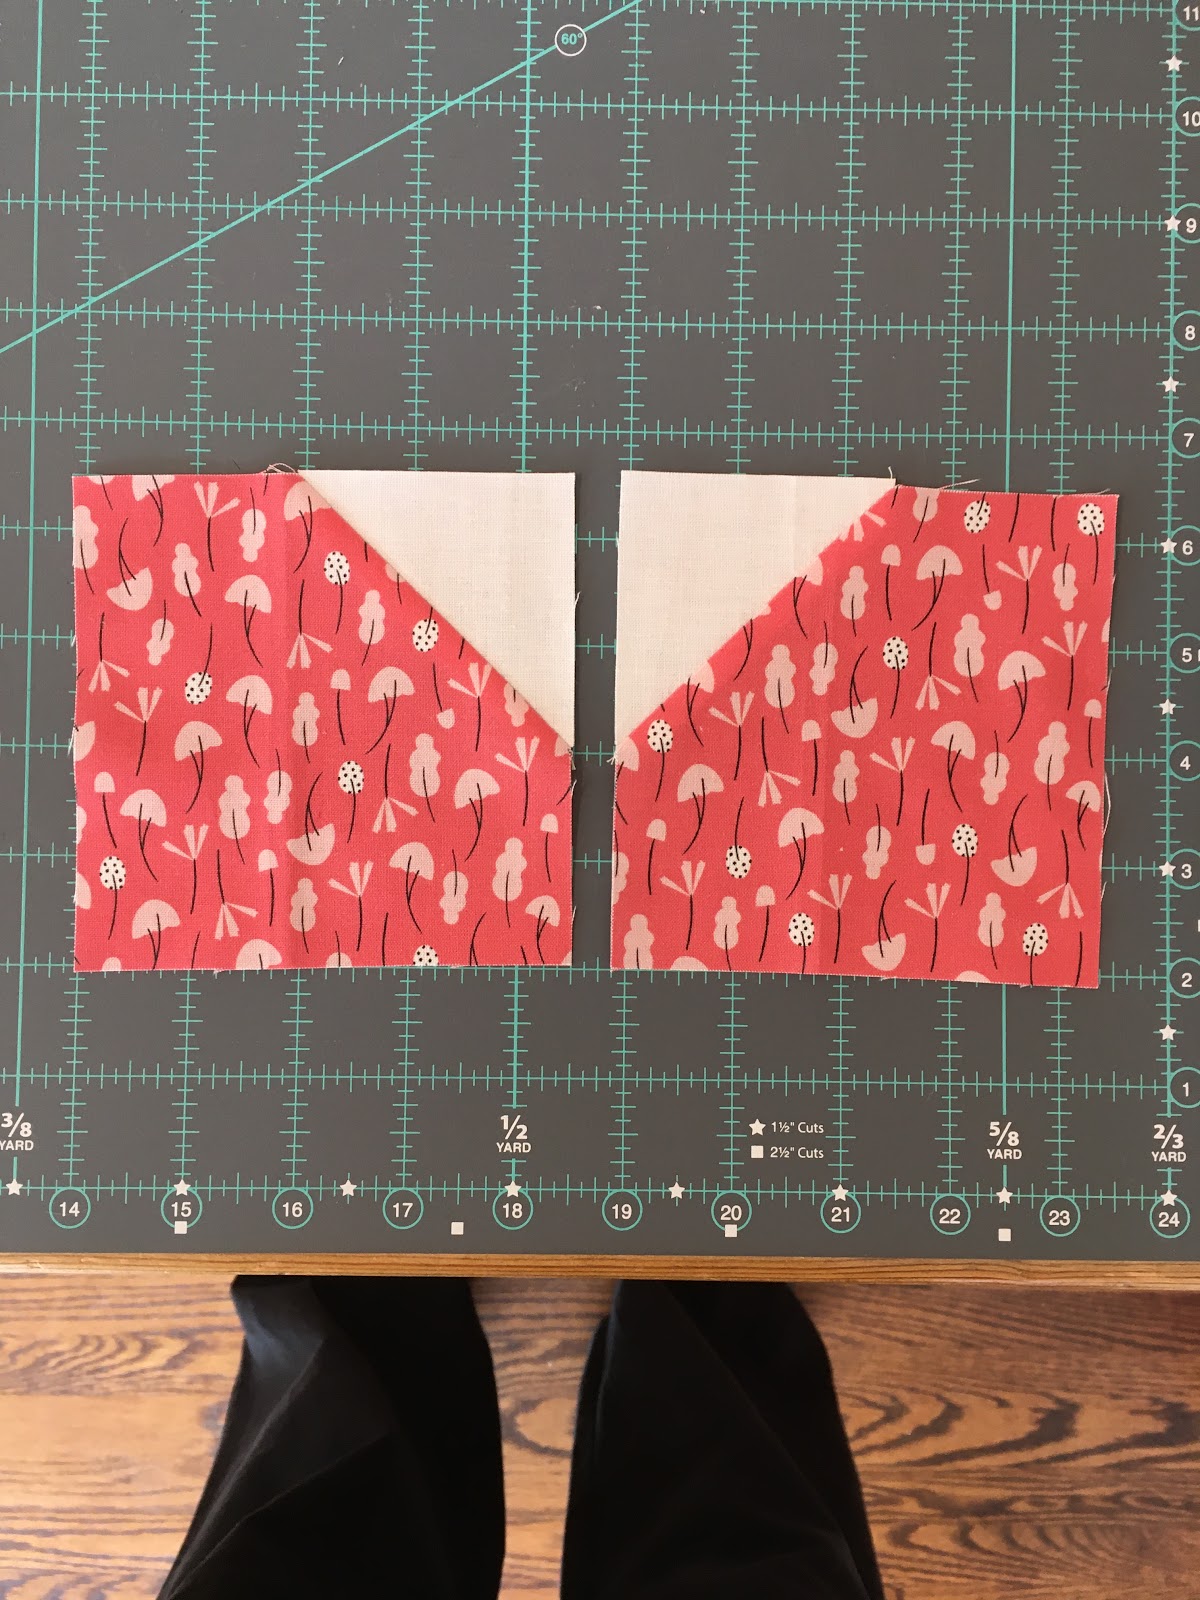
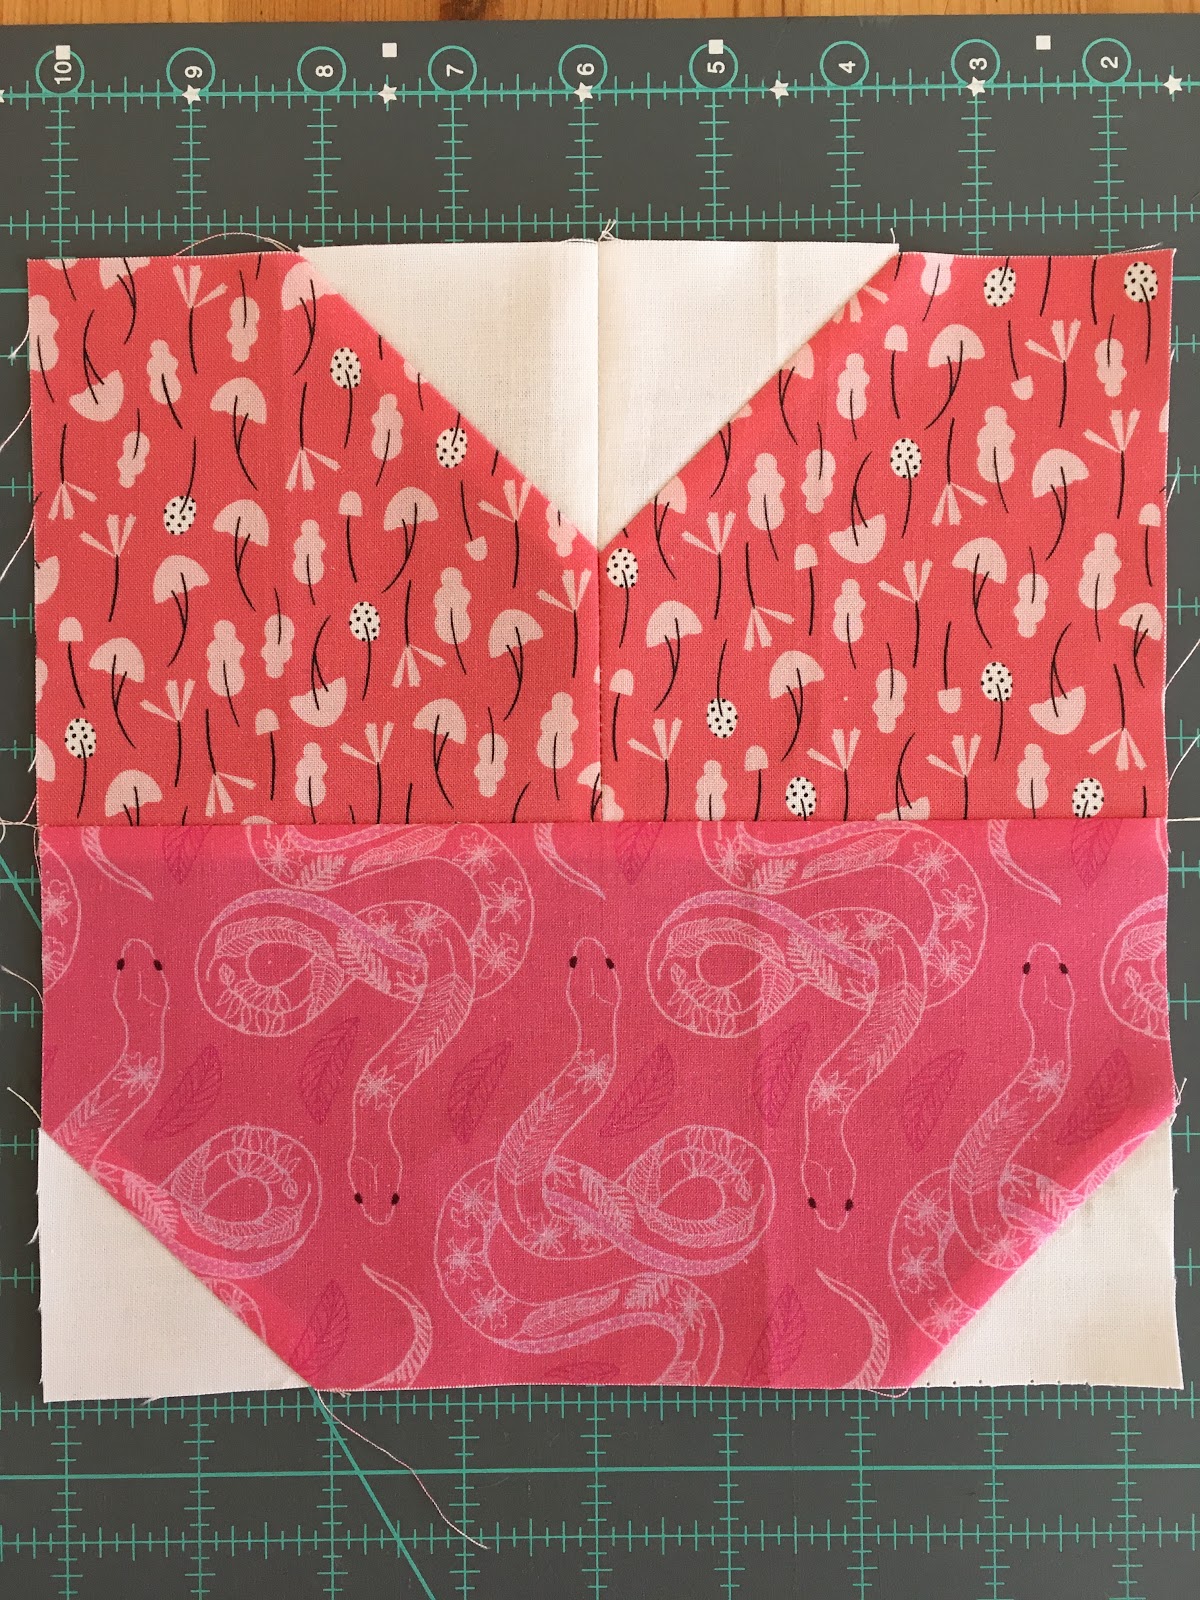
1.TULIP TOP: 

Mark a diagonal line from corner to corner on each white background square. Place in one corner of each 4.5” square.

Stitch along diagonal lines. Trim seam allowance to ¼" and press towards corner. 

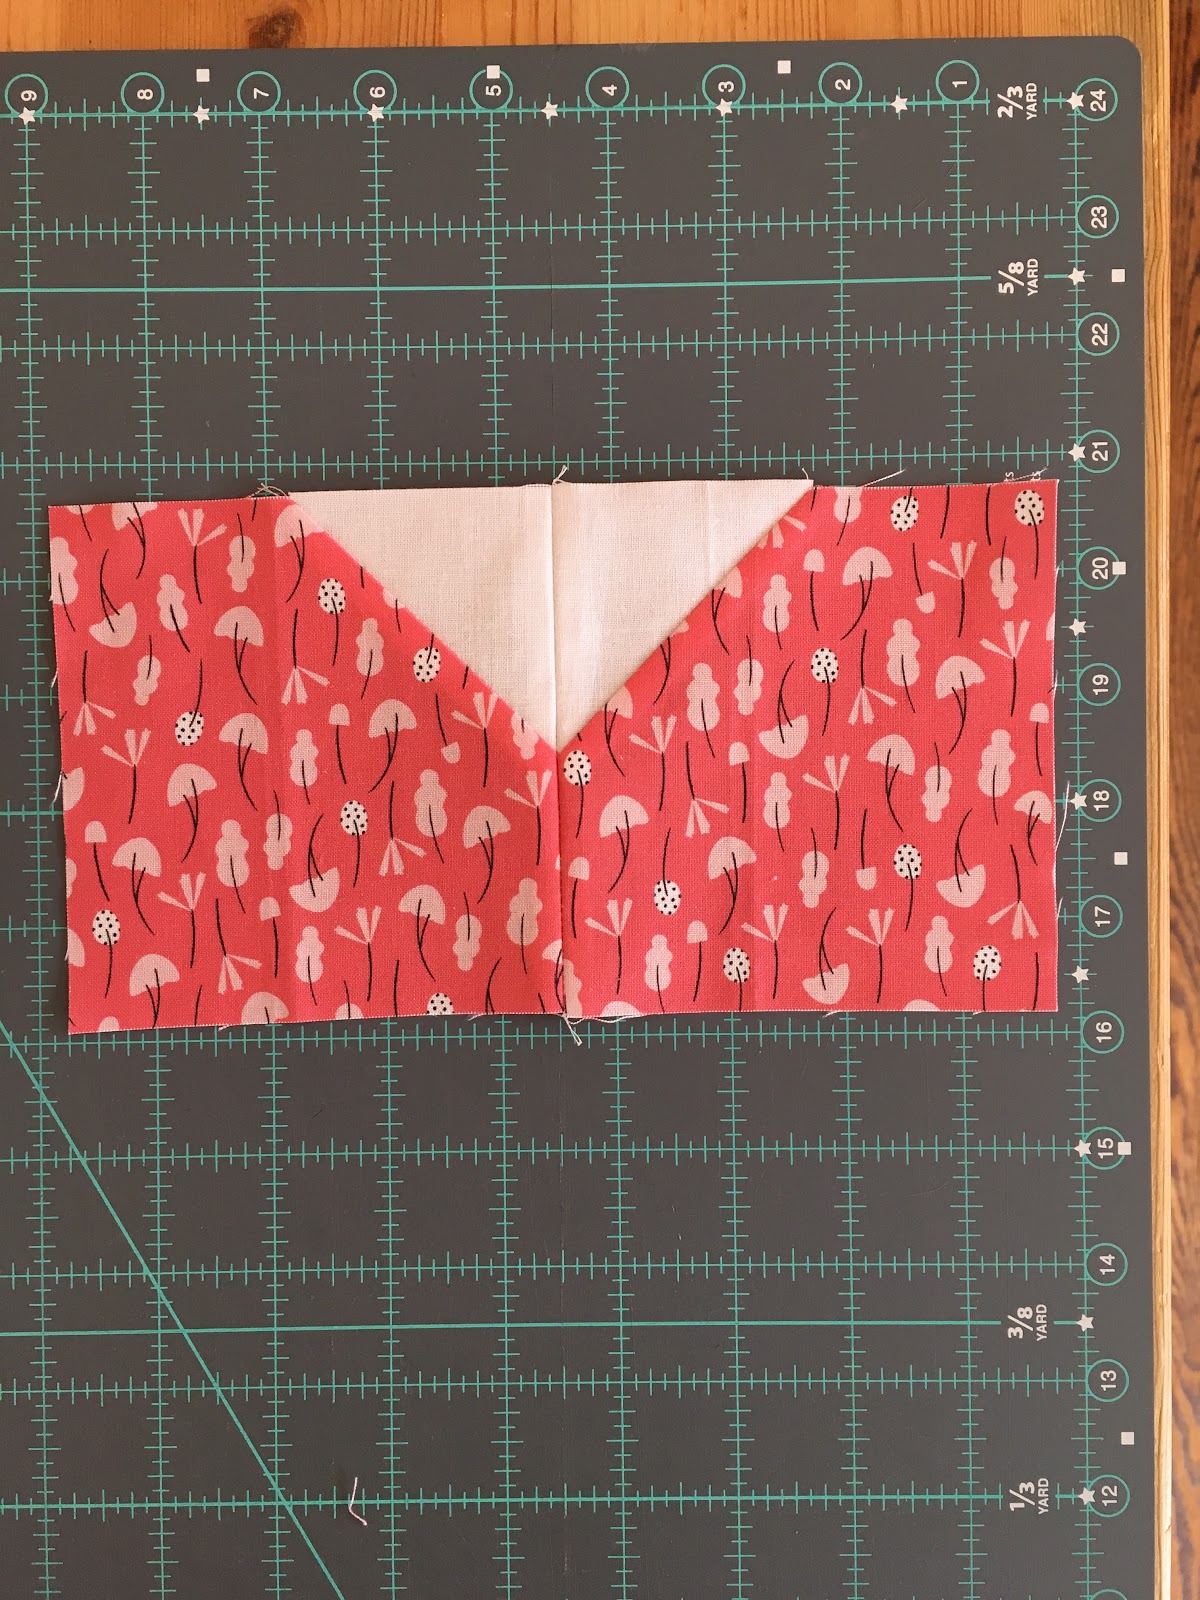
Sew Tulip Top blocks together and press. 
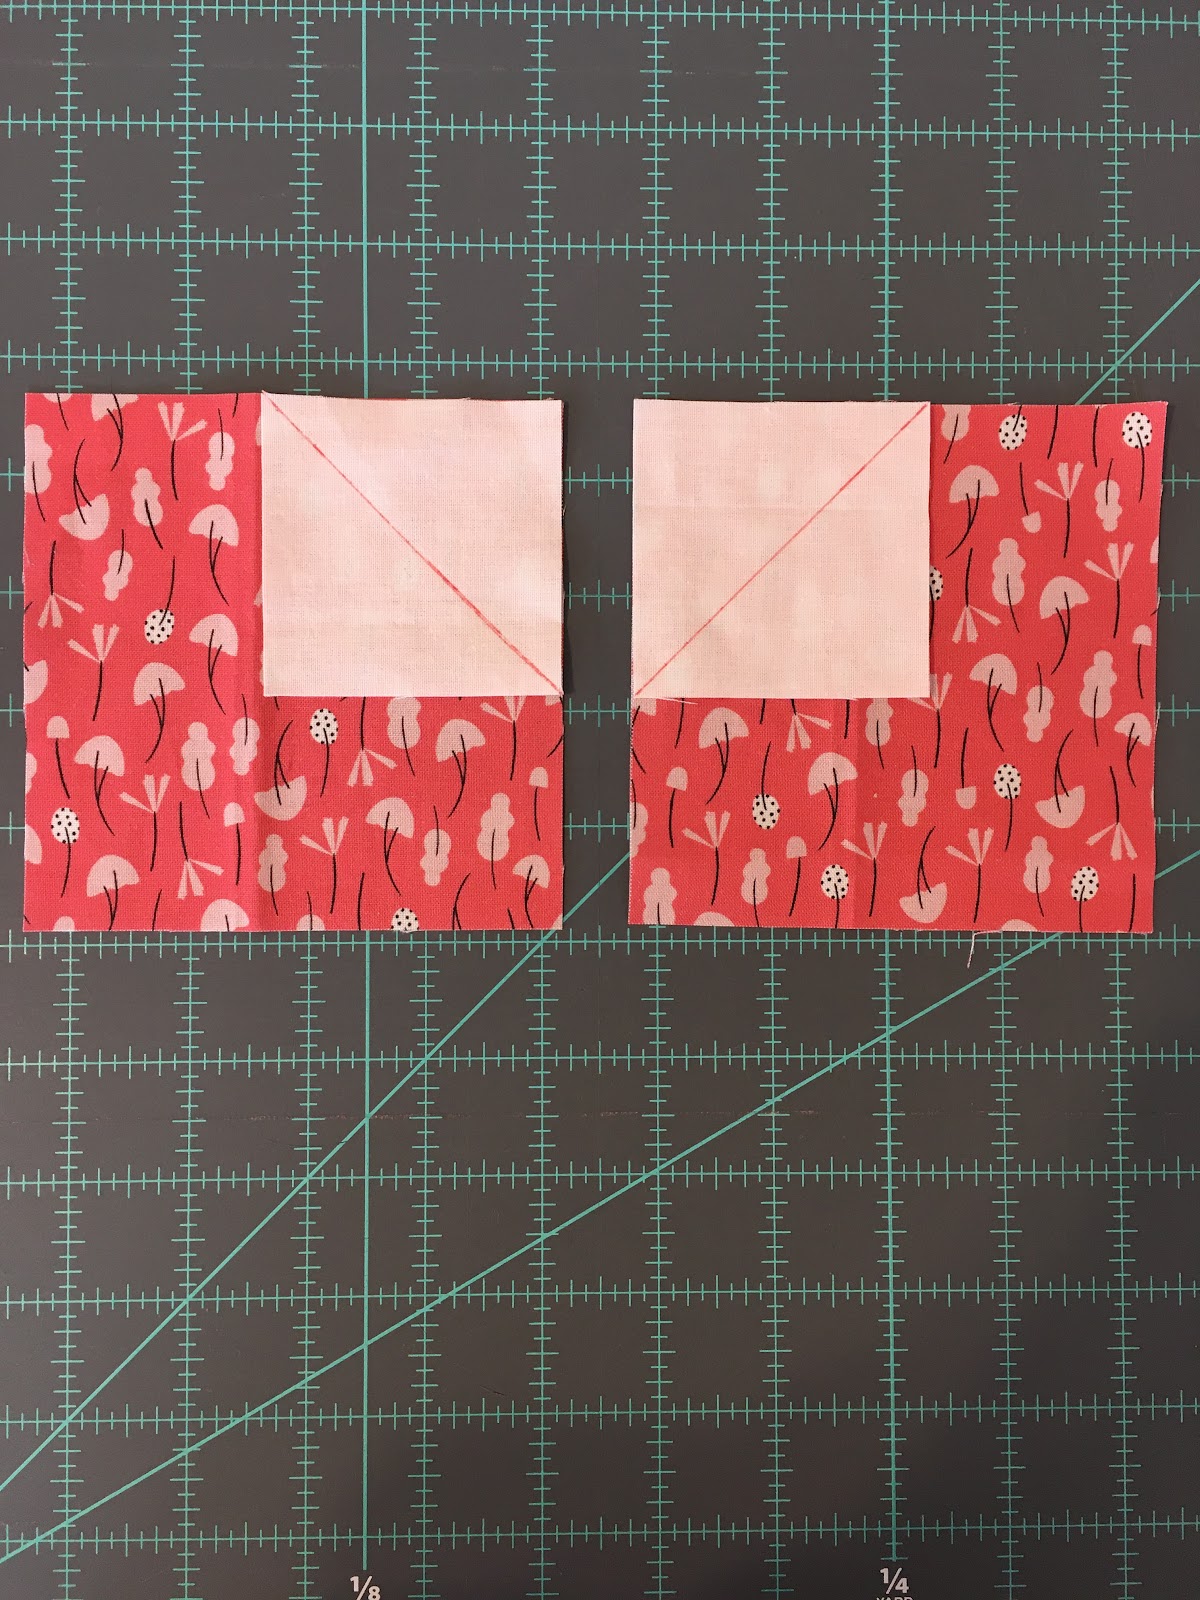
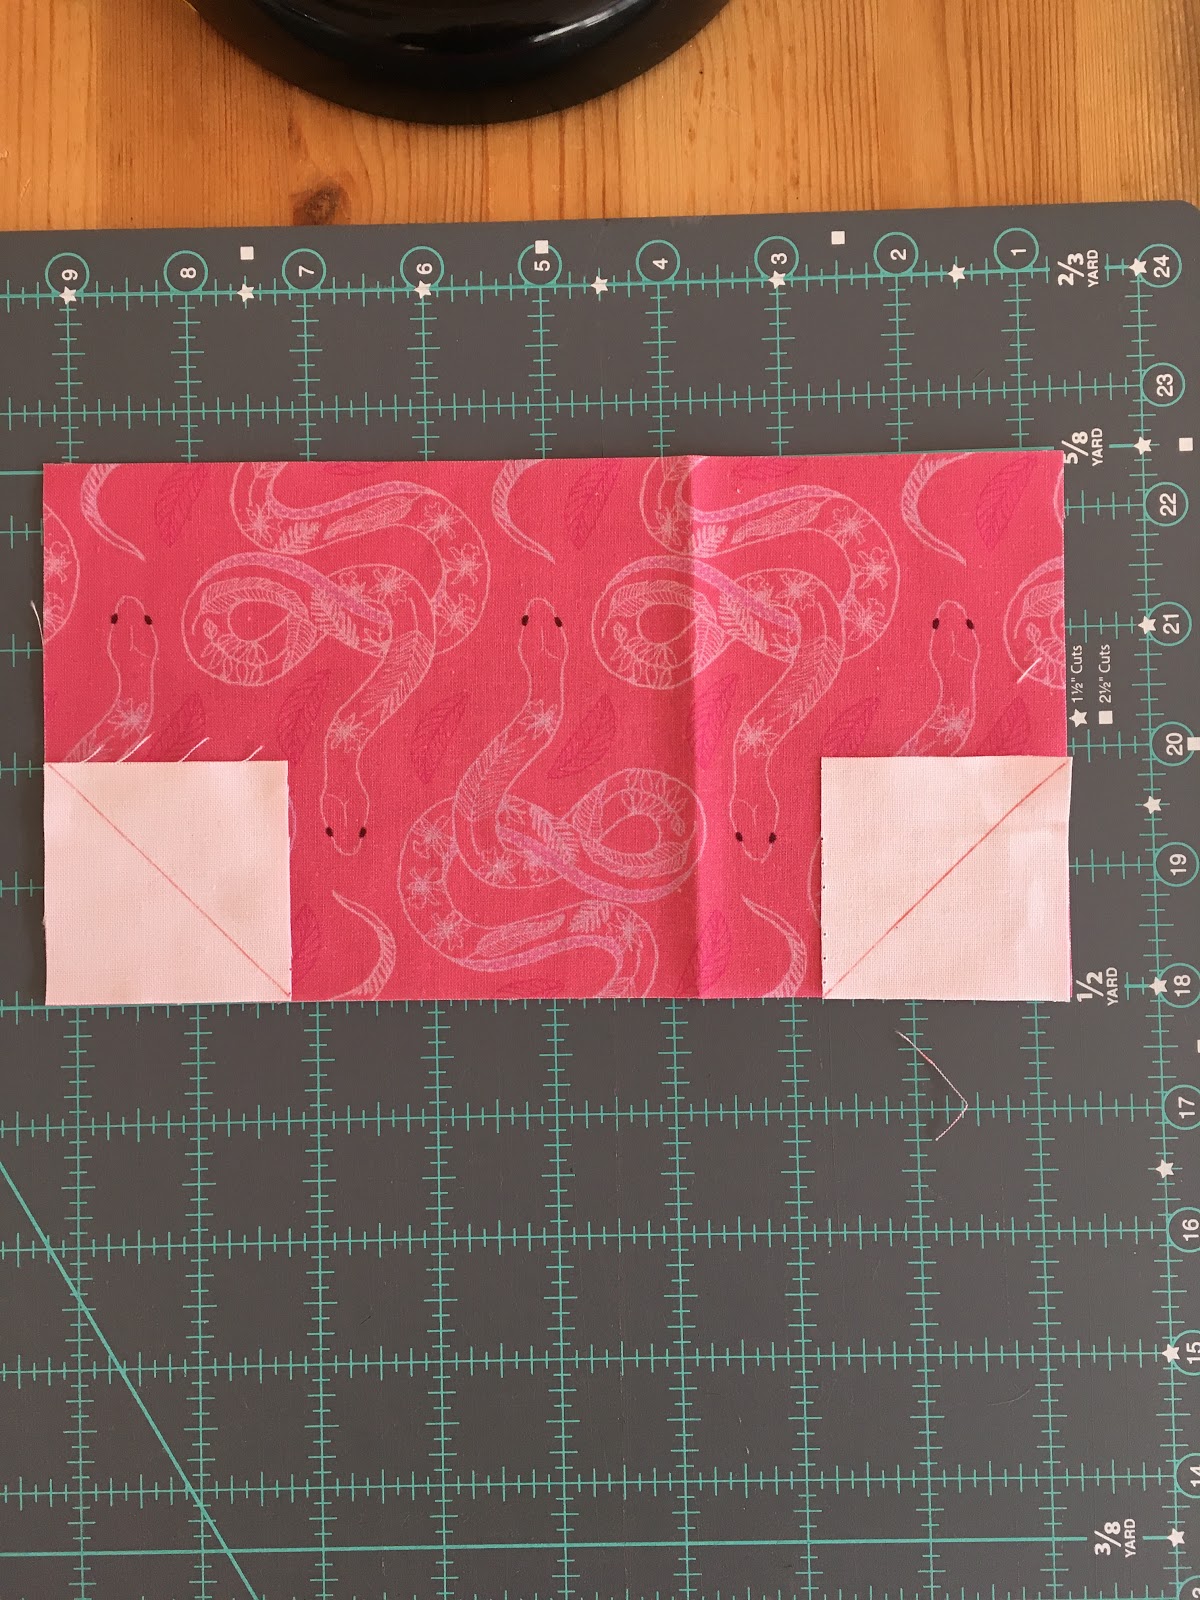
2.TULIP BOTTOM: 

Mark a diagonal line from corner to corner on each white background square. Place in bottom corners of the rectangle.

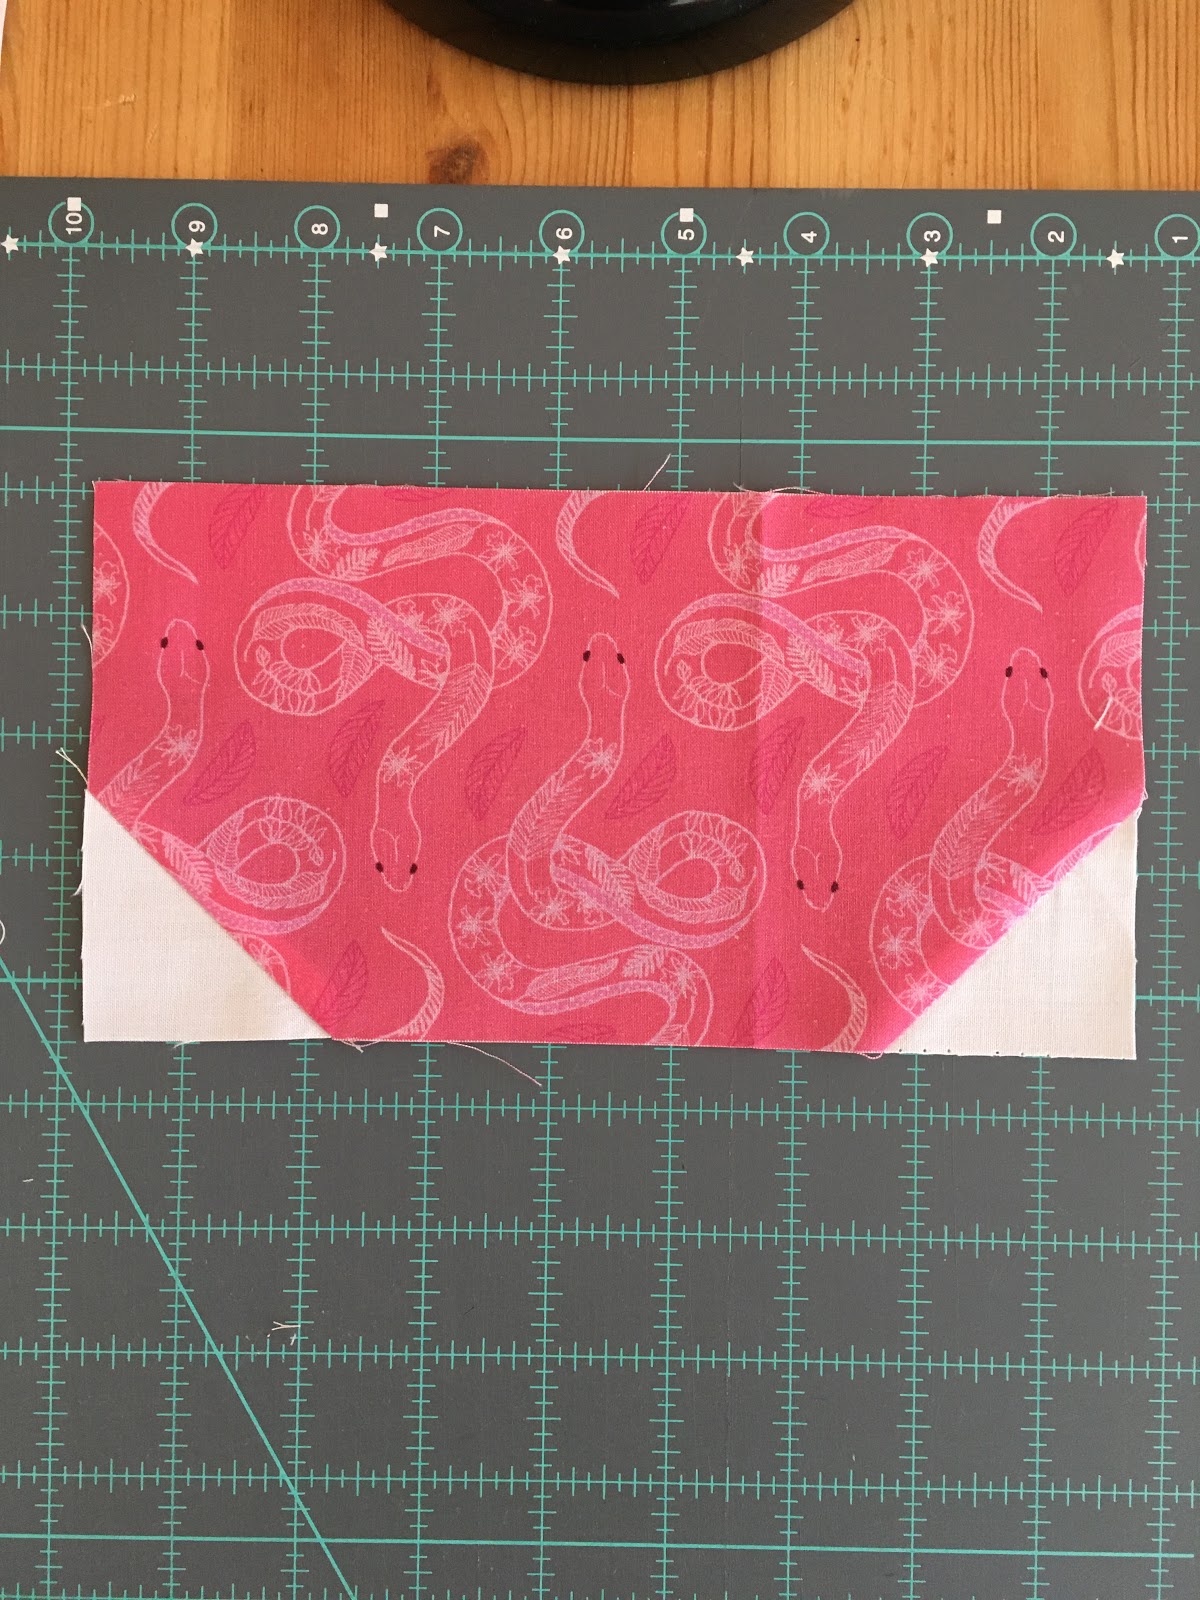
Stitch along diagonal lines. Trim seam allowance to ¼" and press towards corners. 

3. Sew Tulip Bottom to Tulip Top and press. 
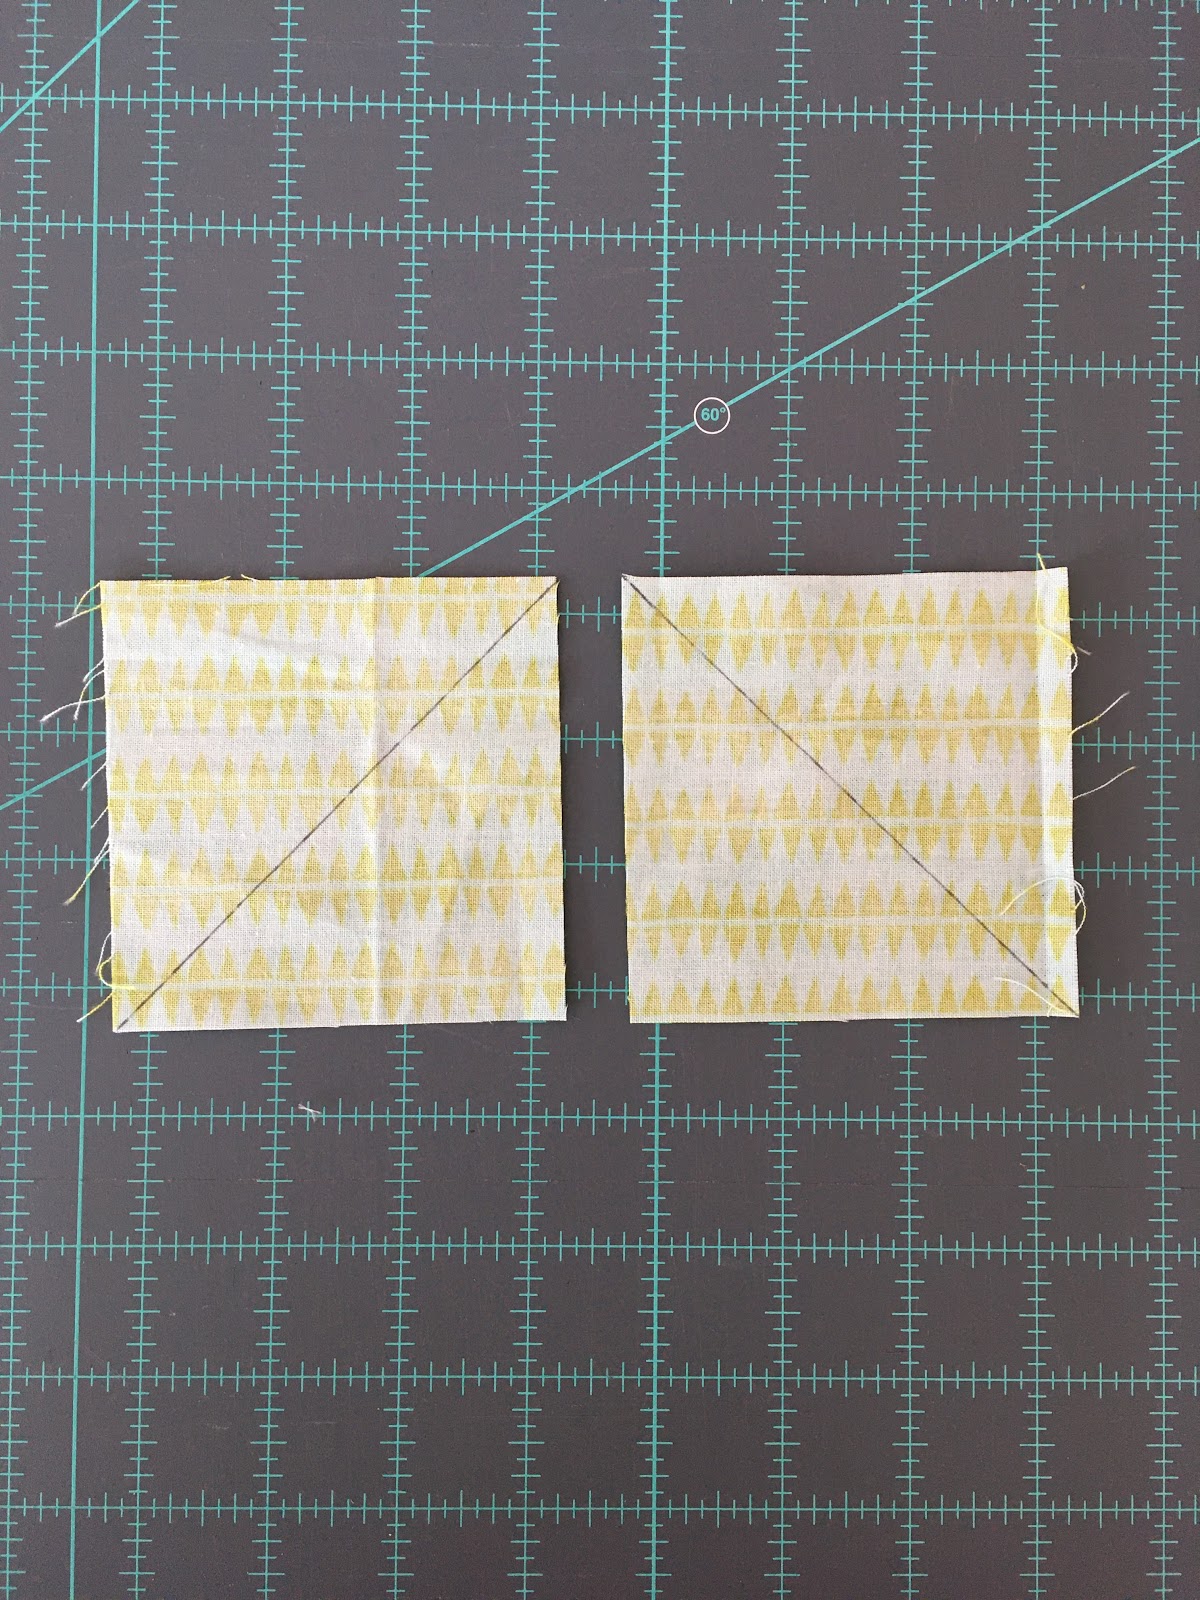
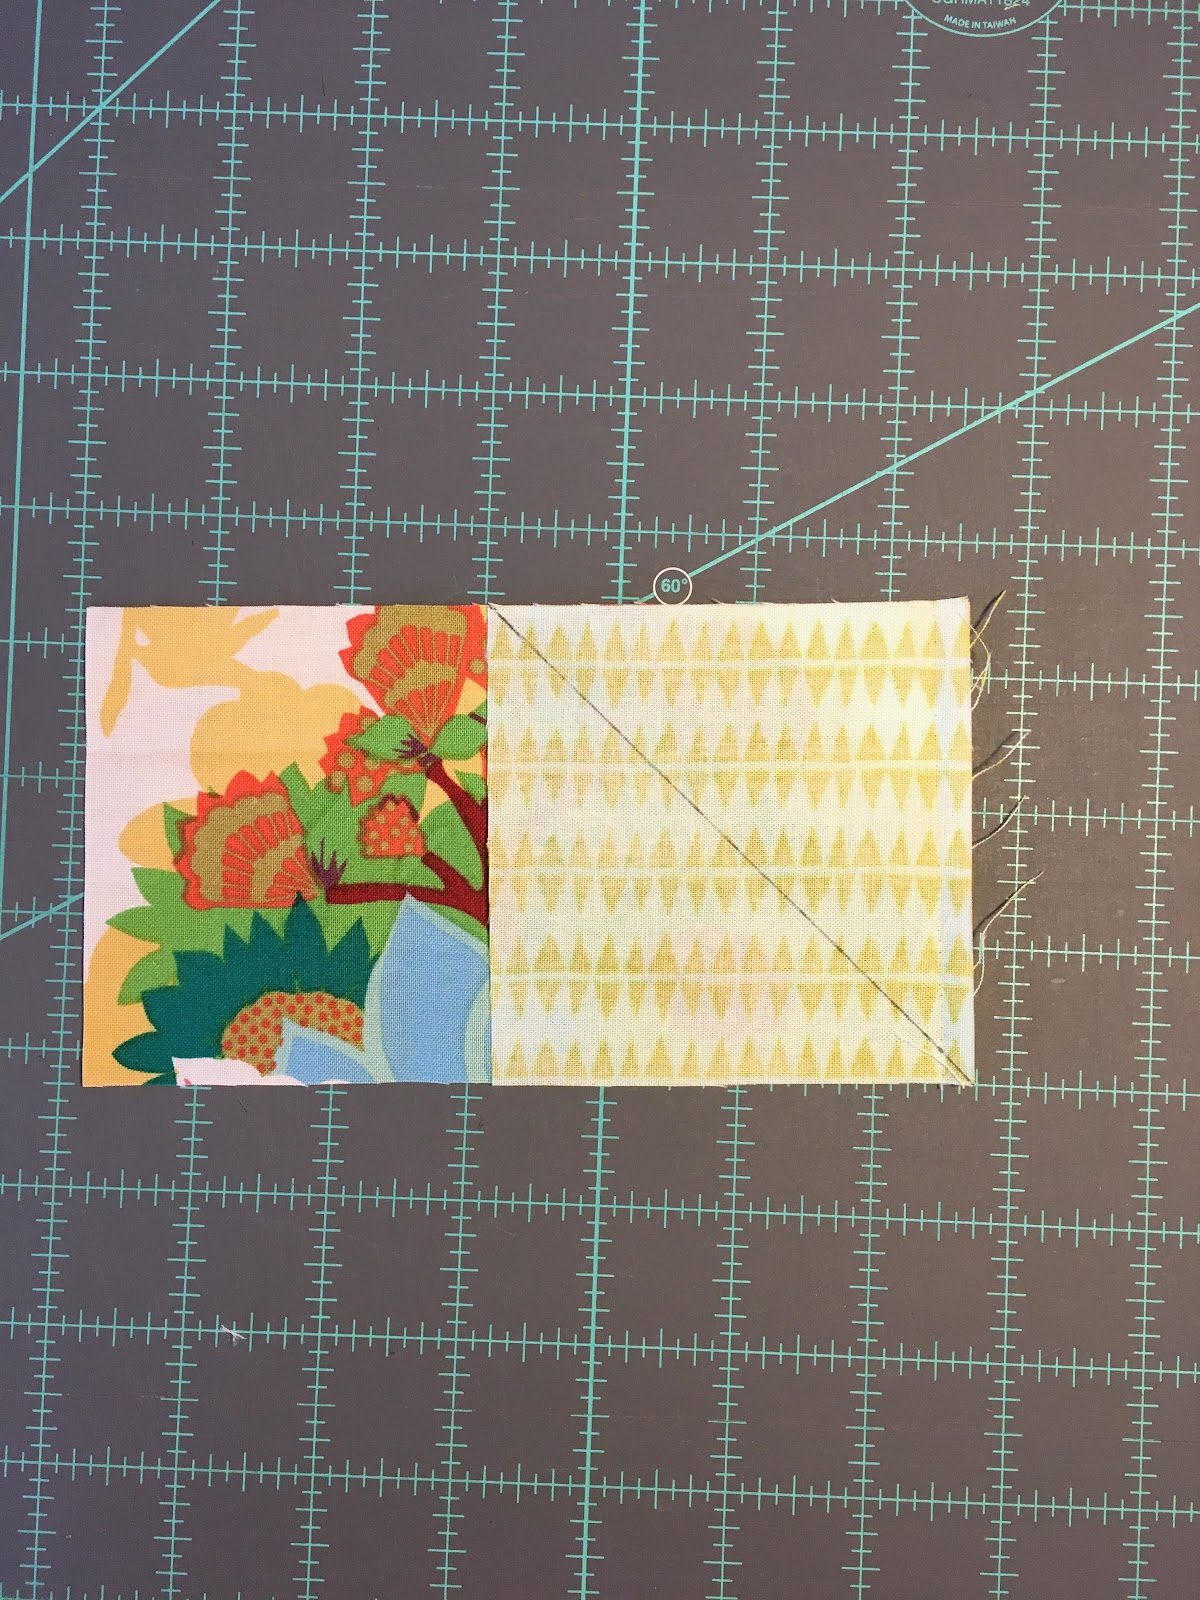
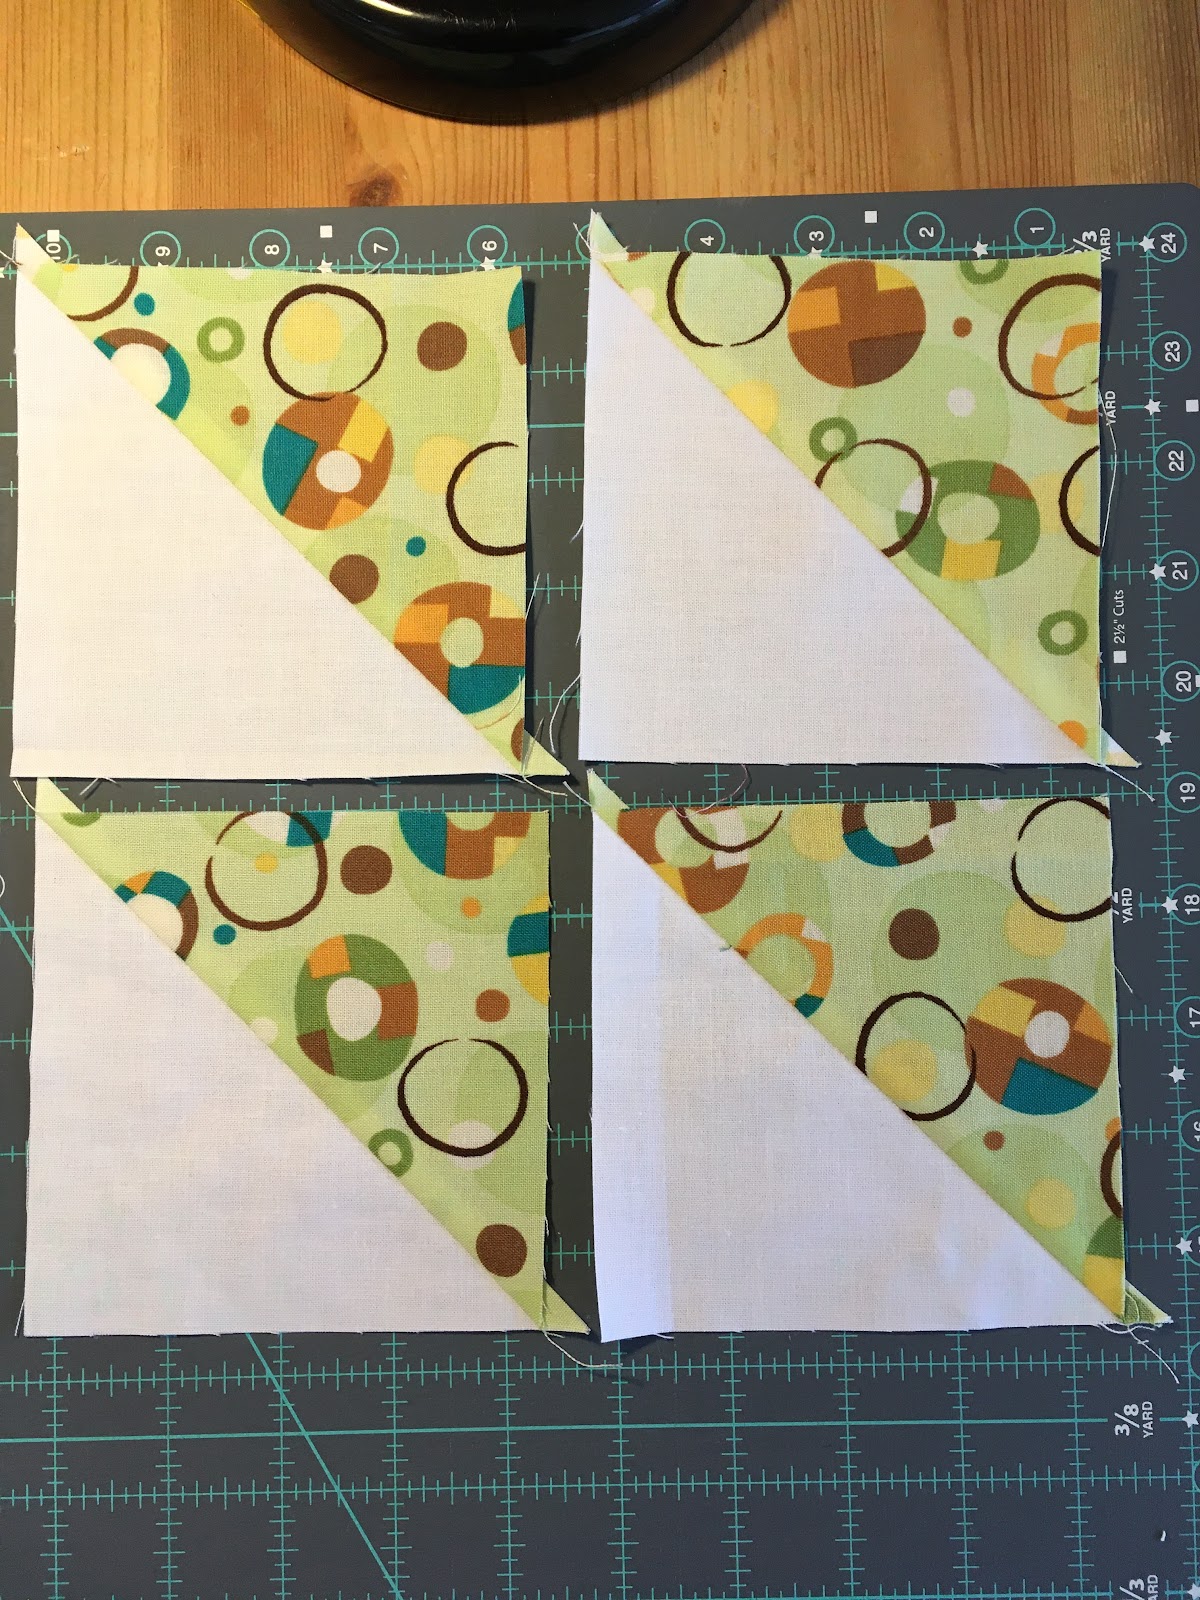
4. LEAF BLOCKS: 

To make Half Square Triangles (HSTs) - 

Mark a diagonal line from corner to corner on each white background square. 

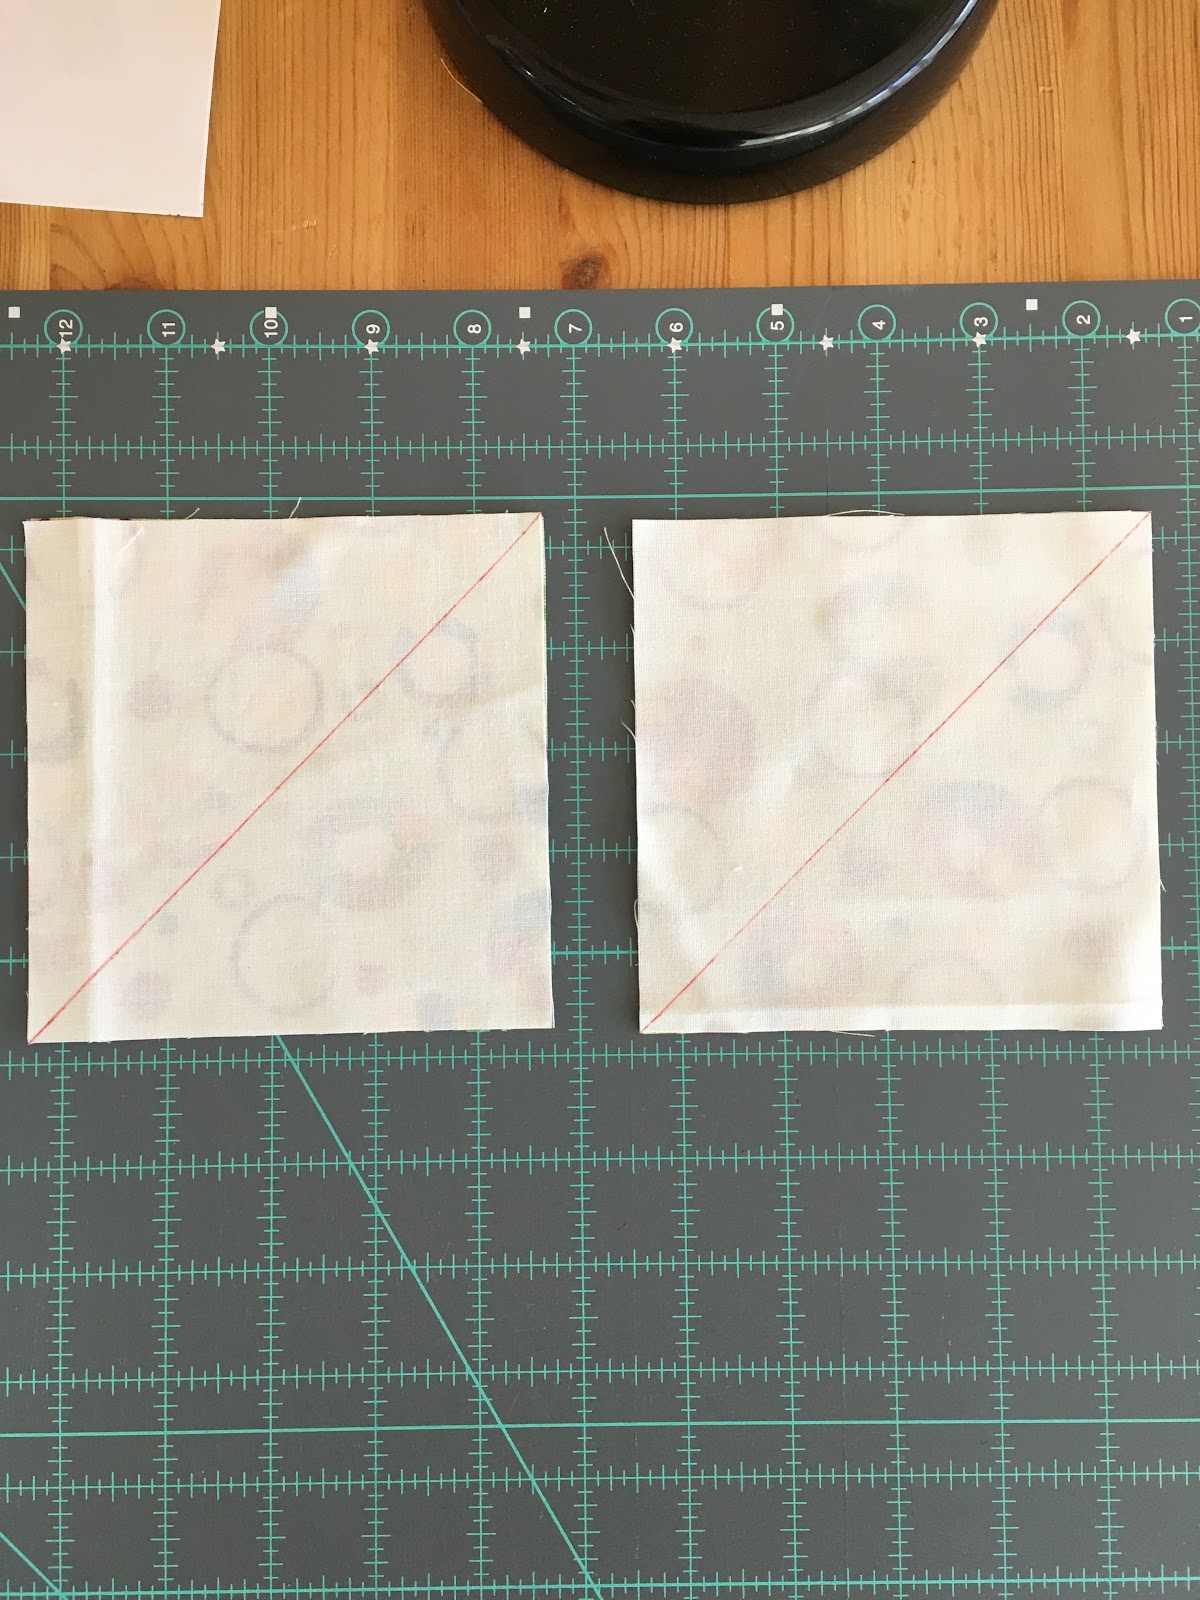
With right sides together, make pairs of green and white squares. Sew ¼" from each side of marked line. 

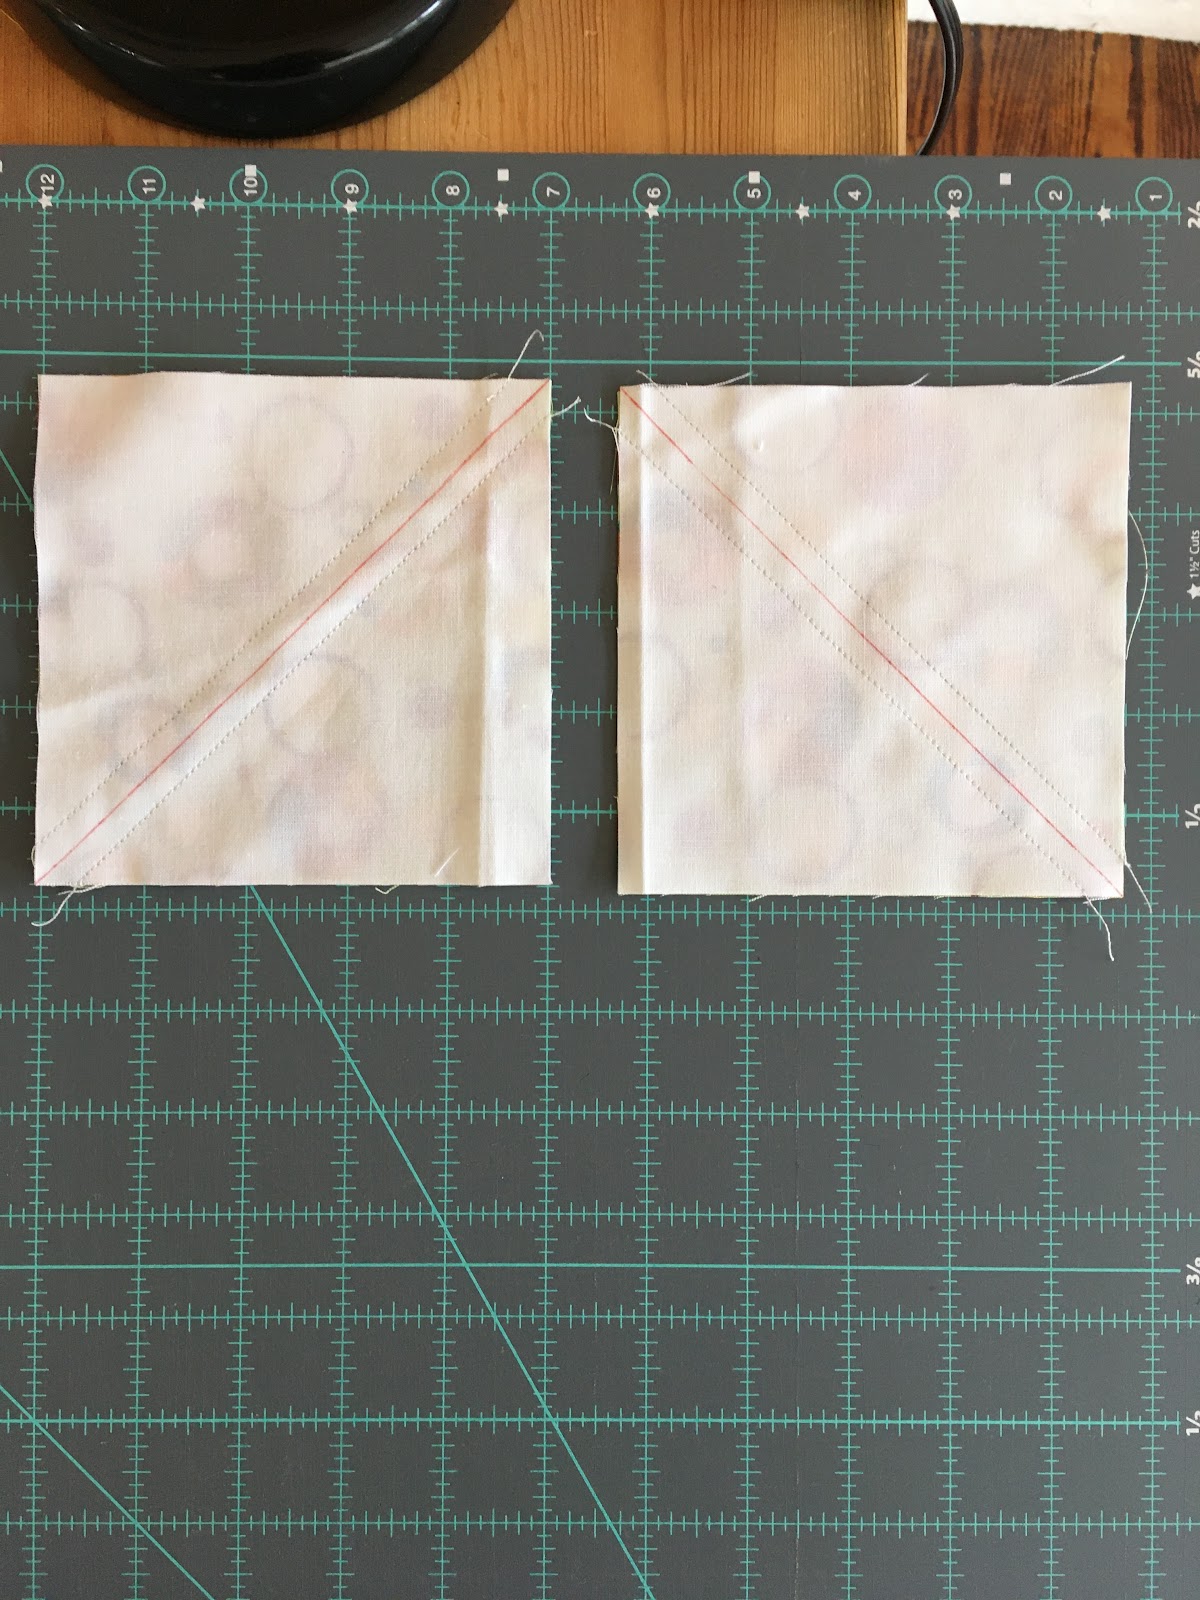
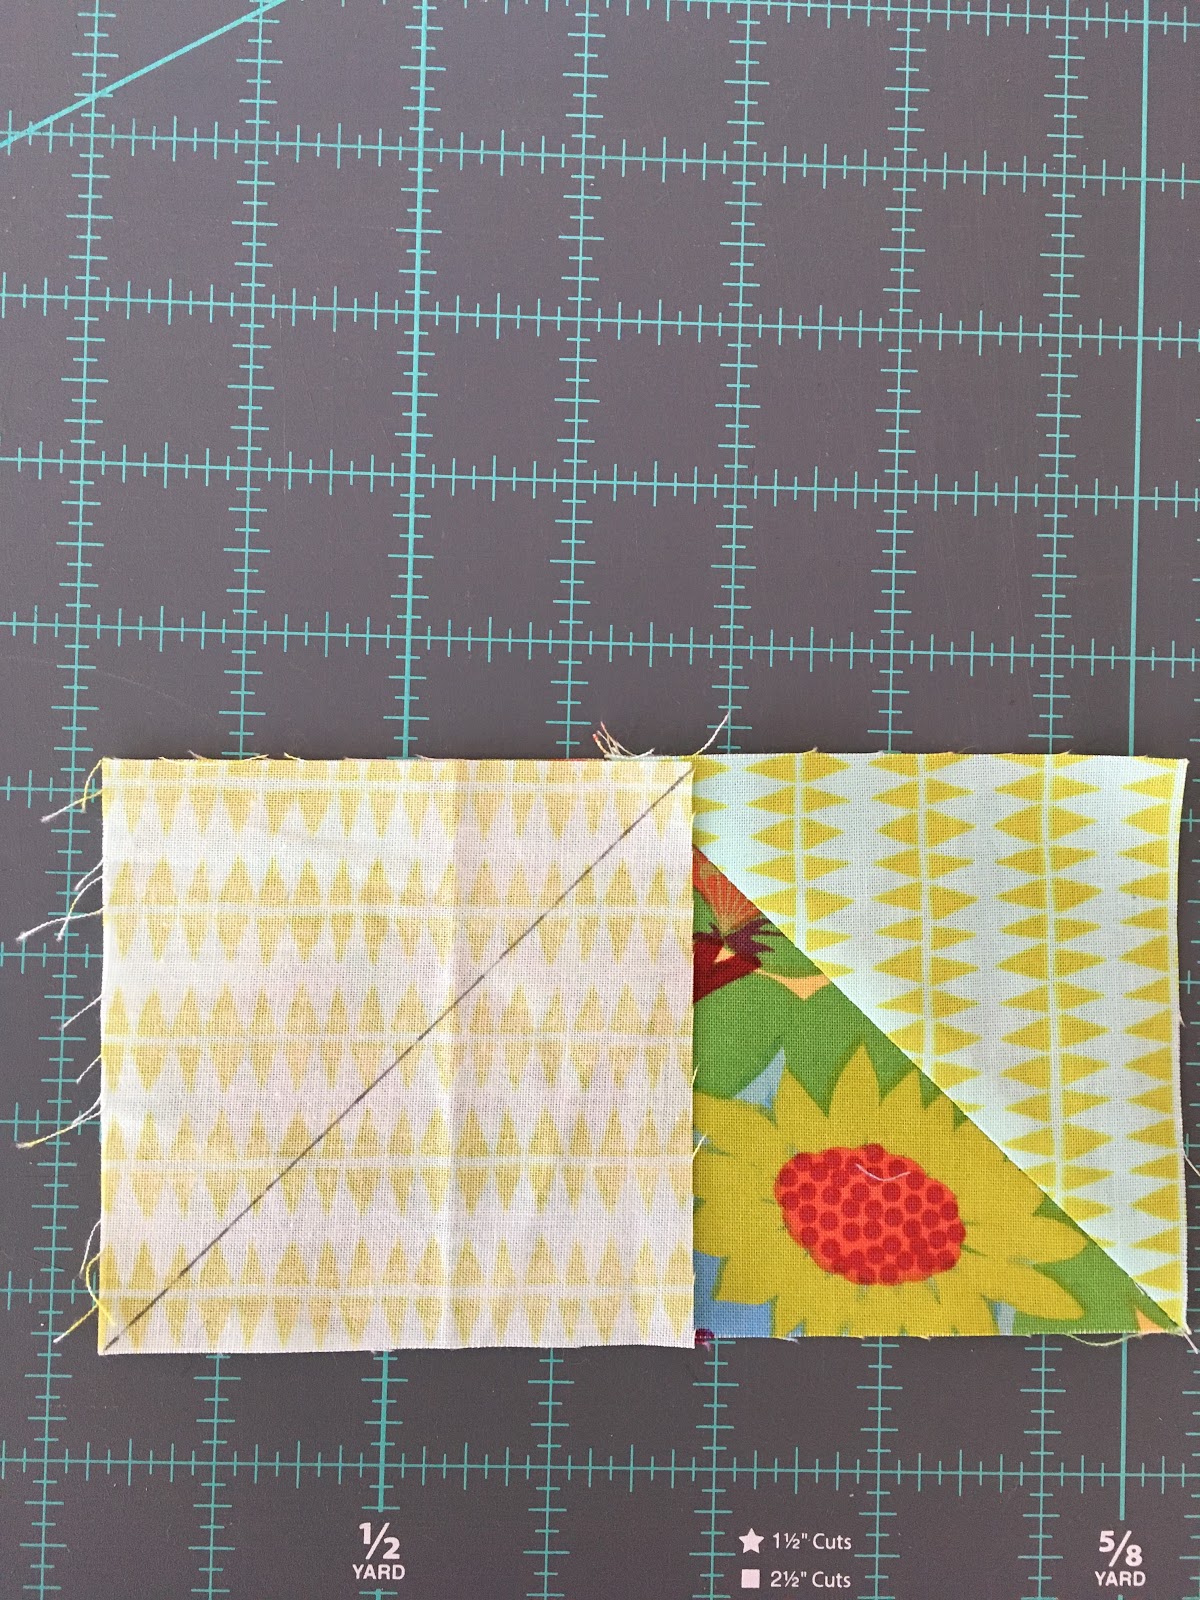
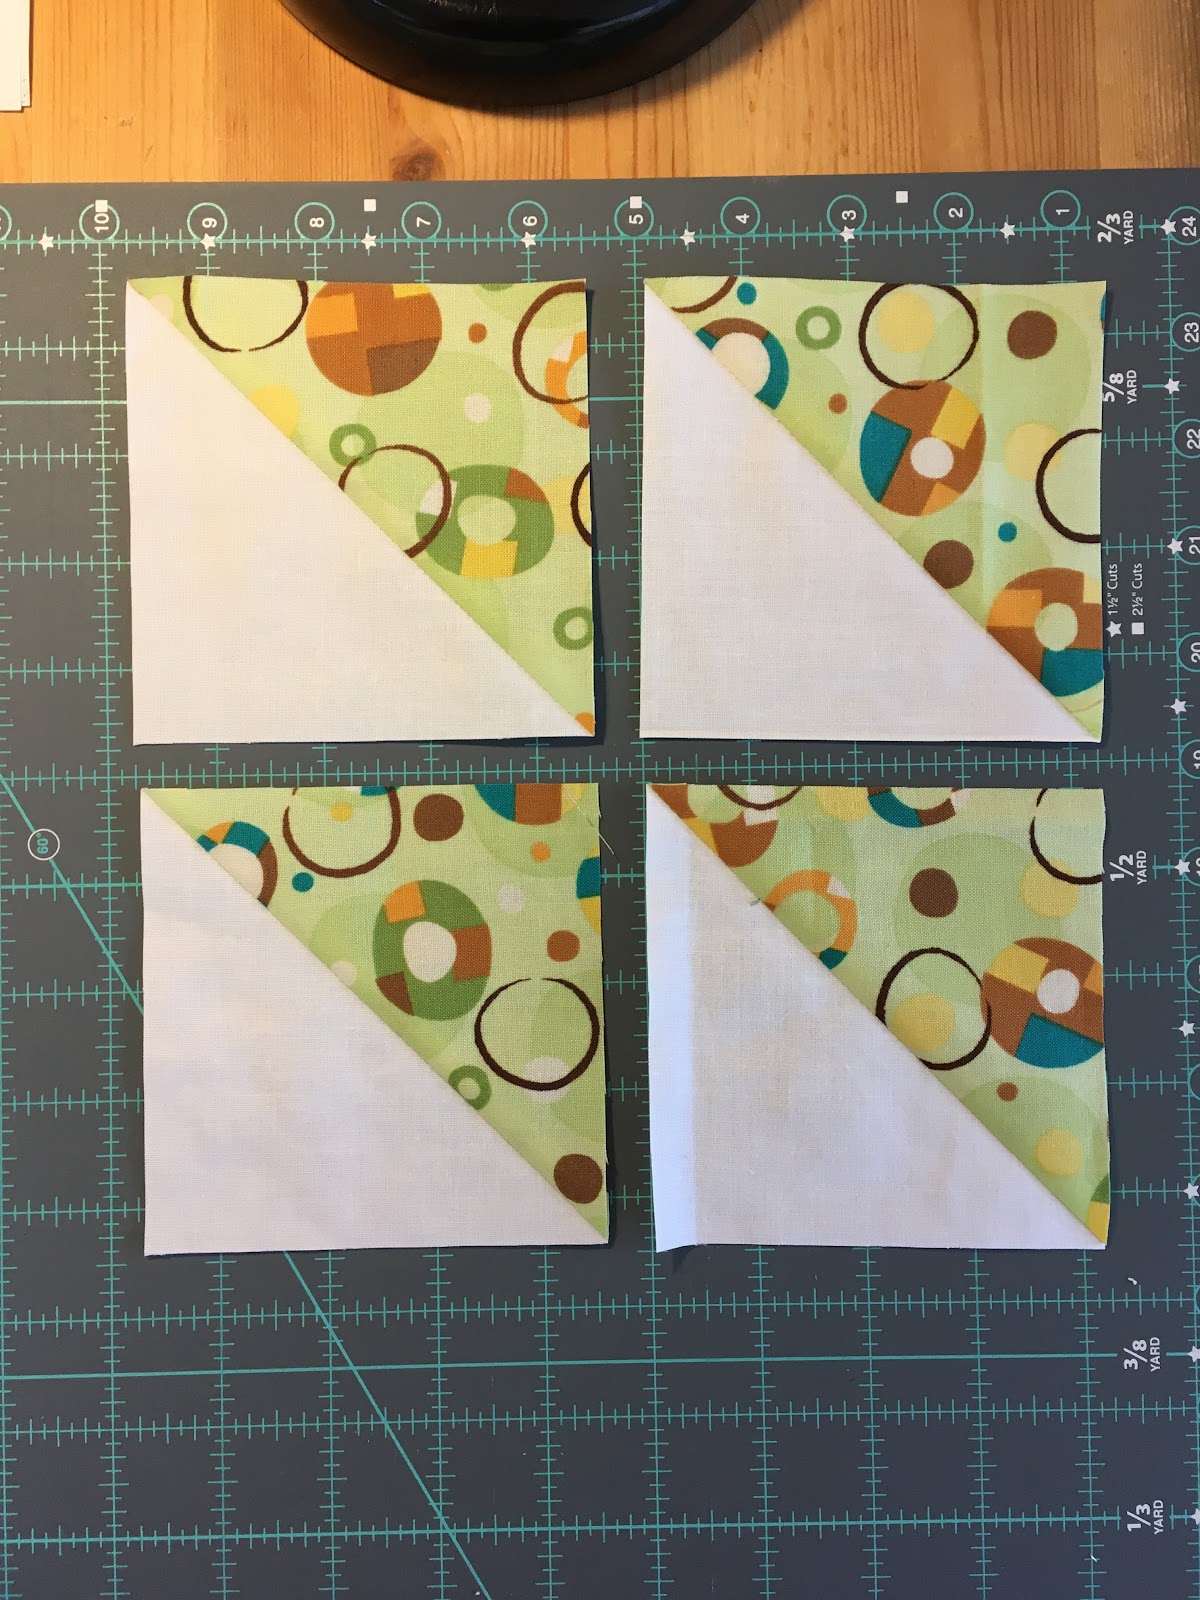
Cut each block in two along marked line to yield four units.

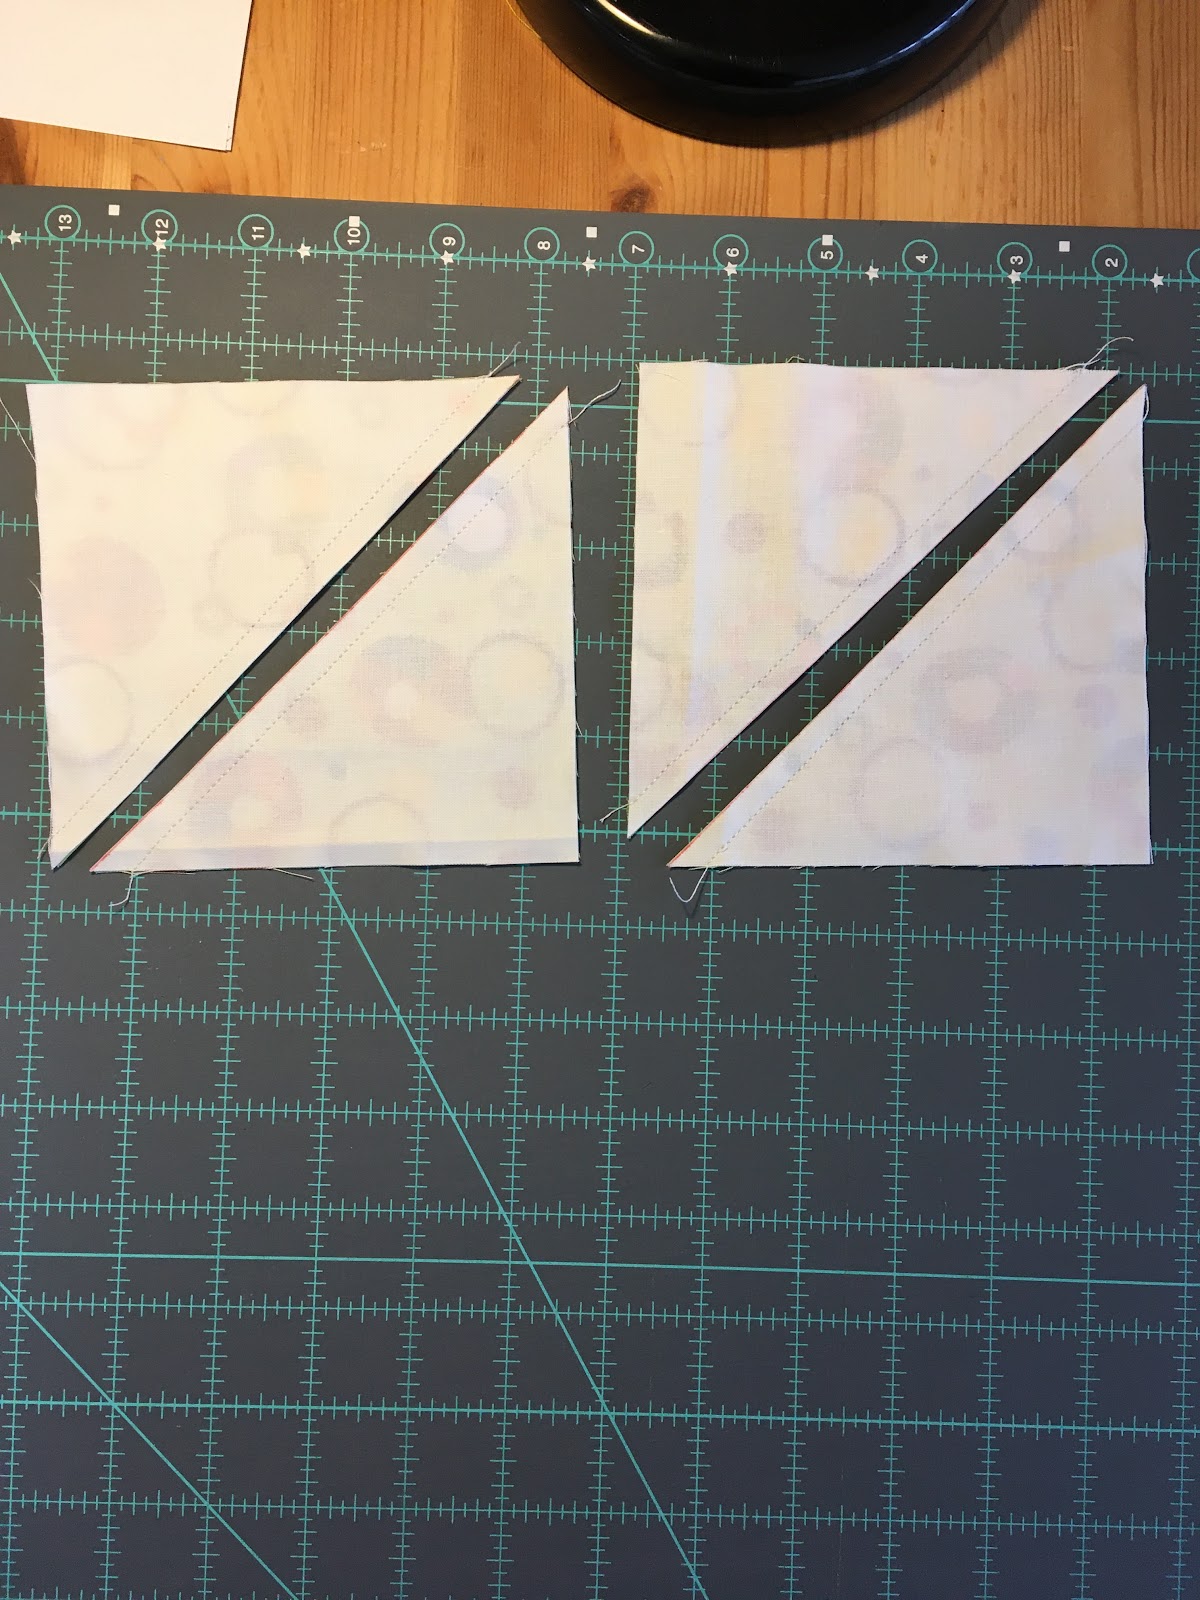
Press to make four HST blocks. 

Trim blocks to 4.25" square. 

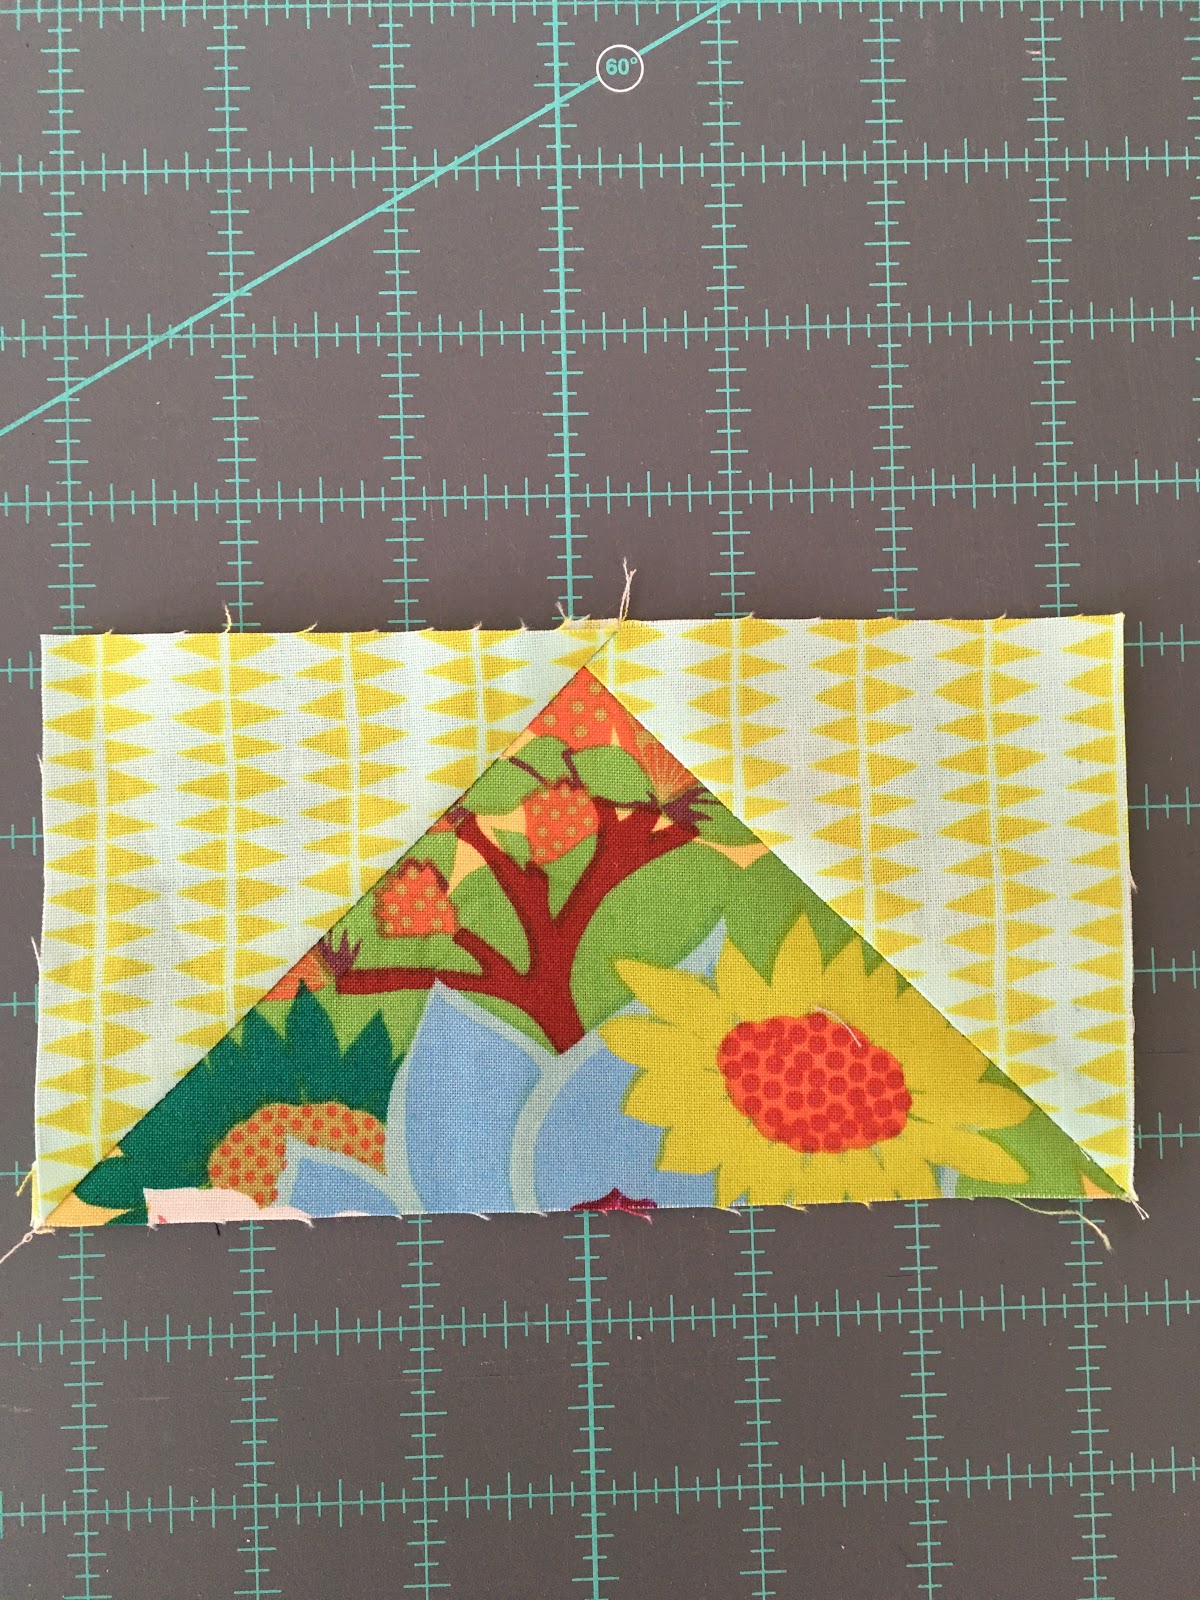
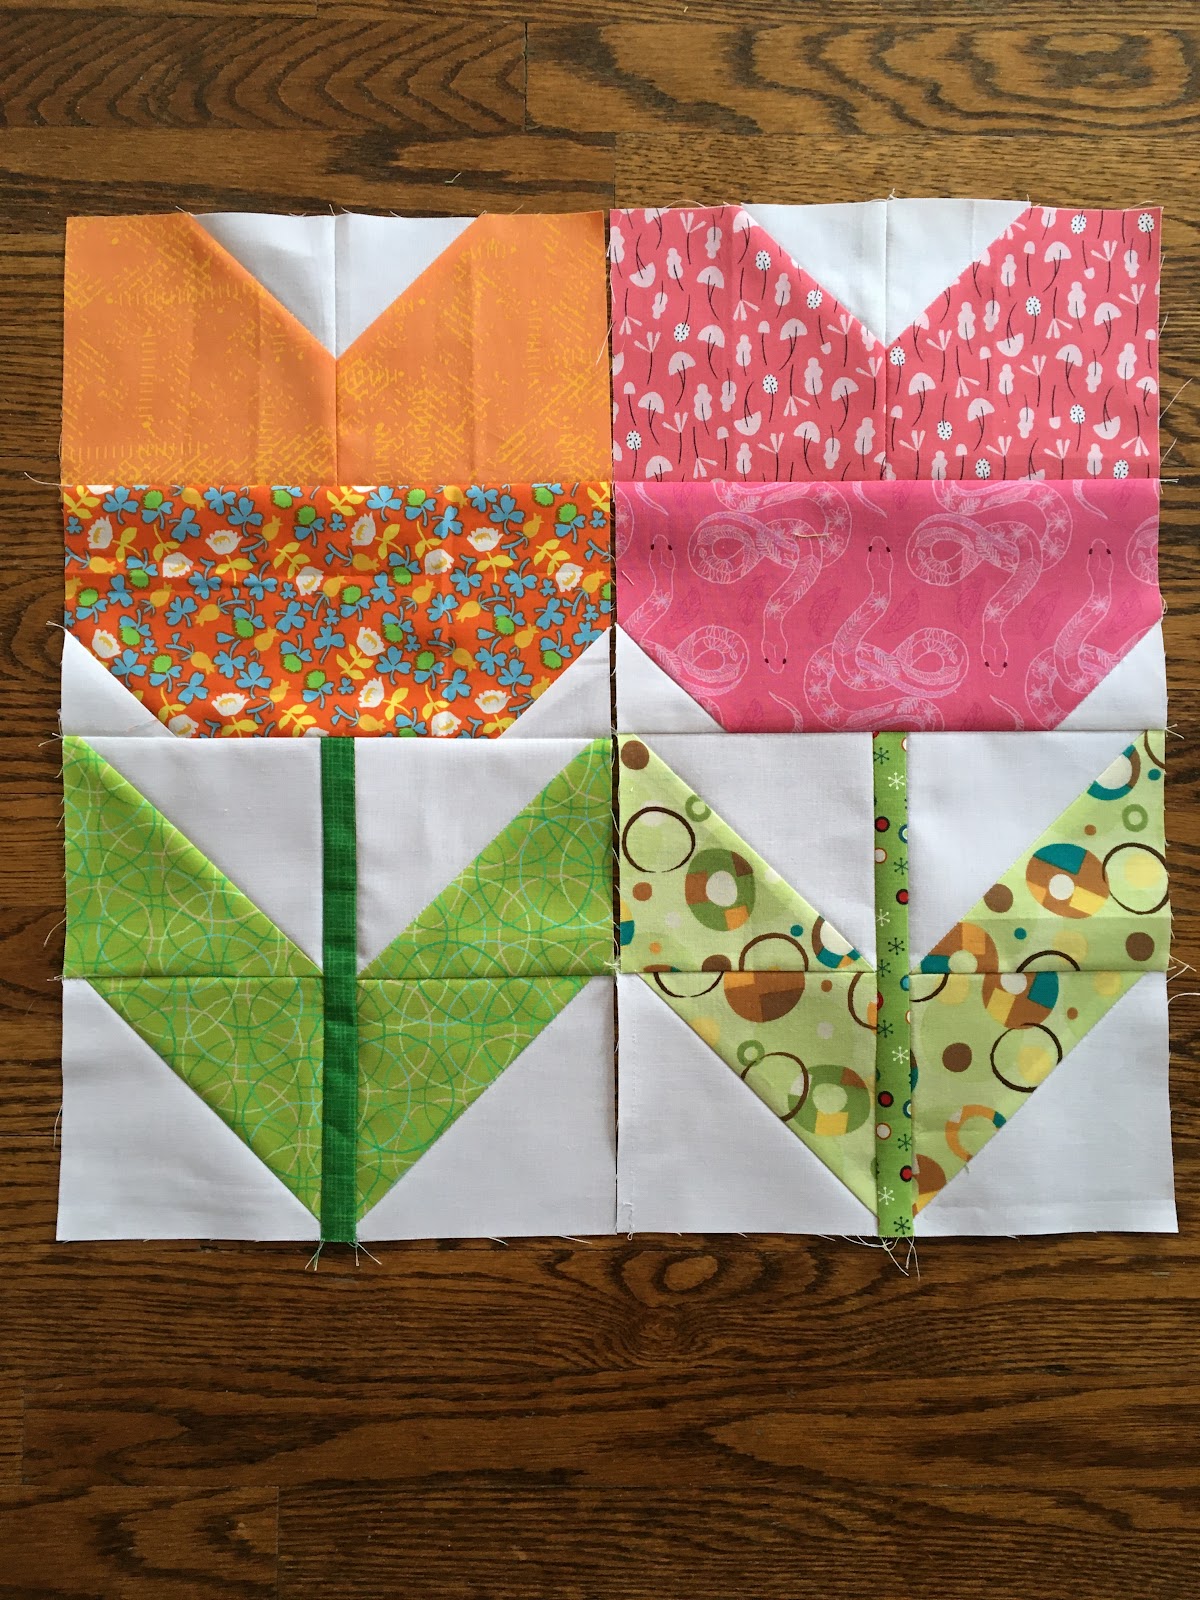
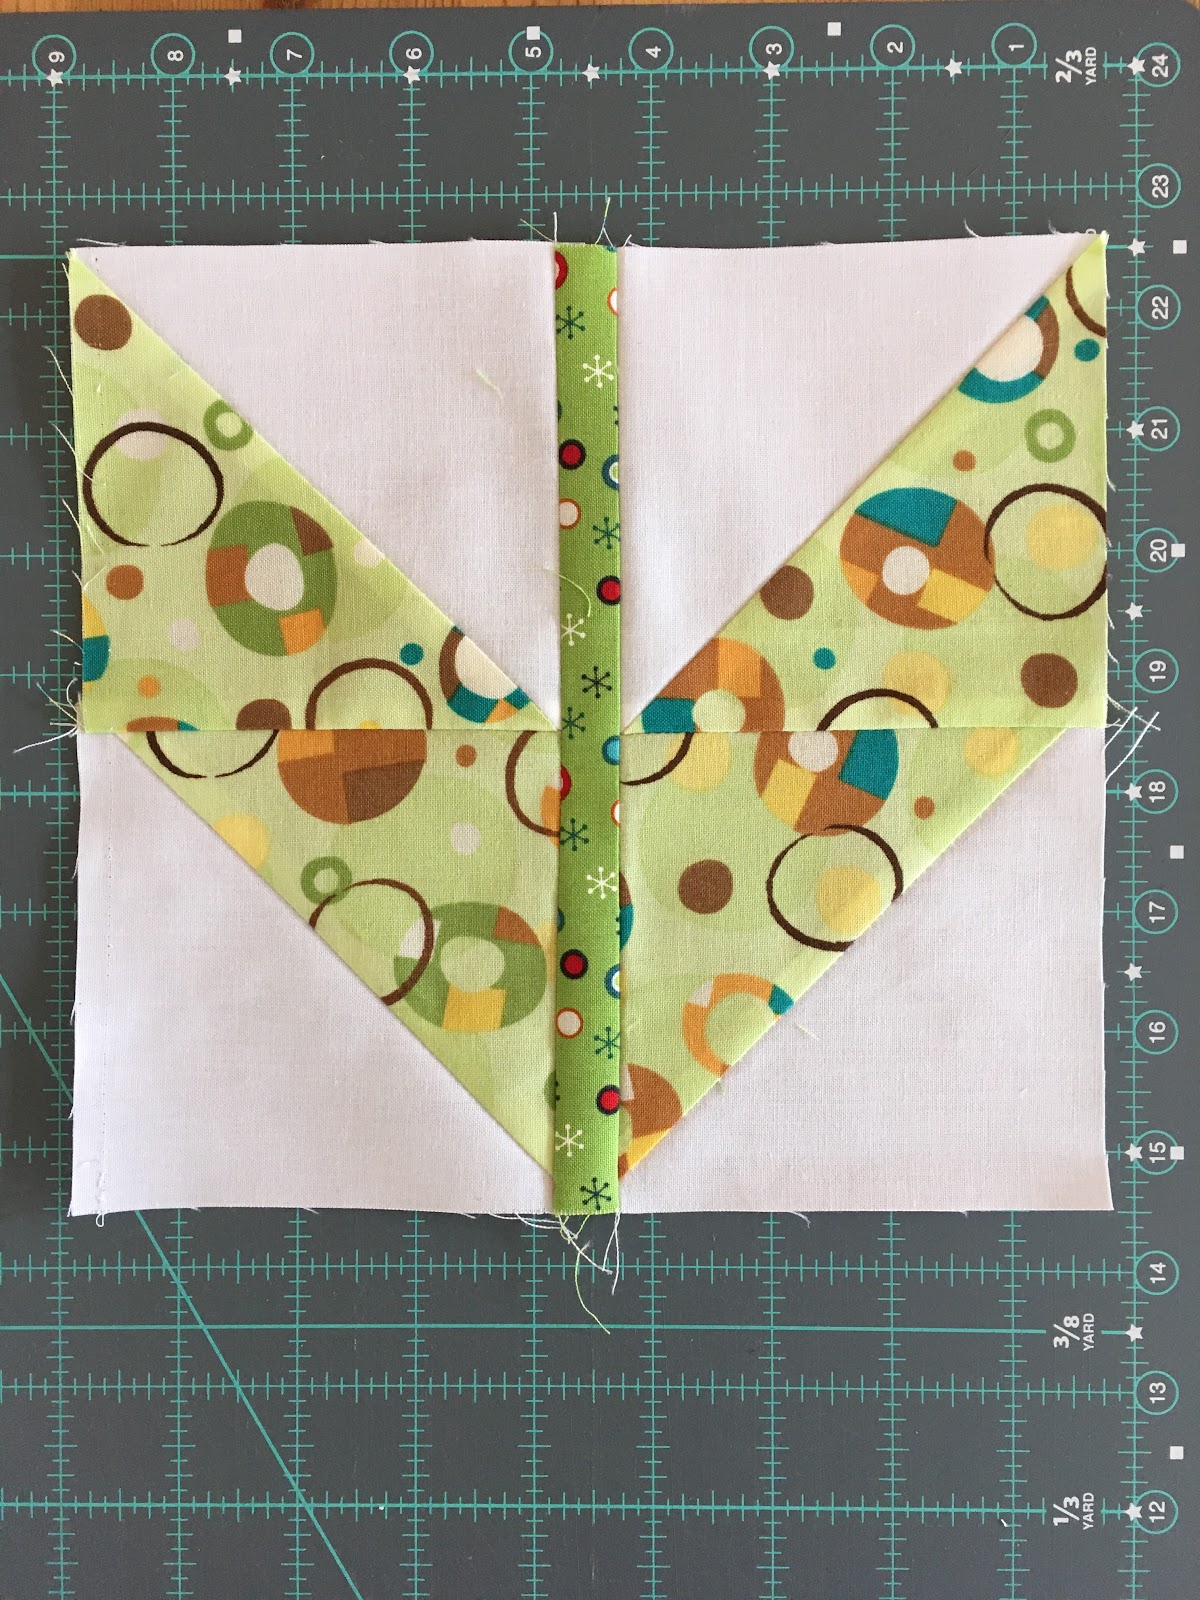
5. Arrange HSTs to form a Left Leaf and a Right Leaf.
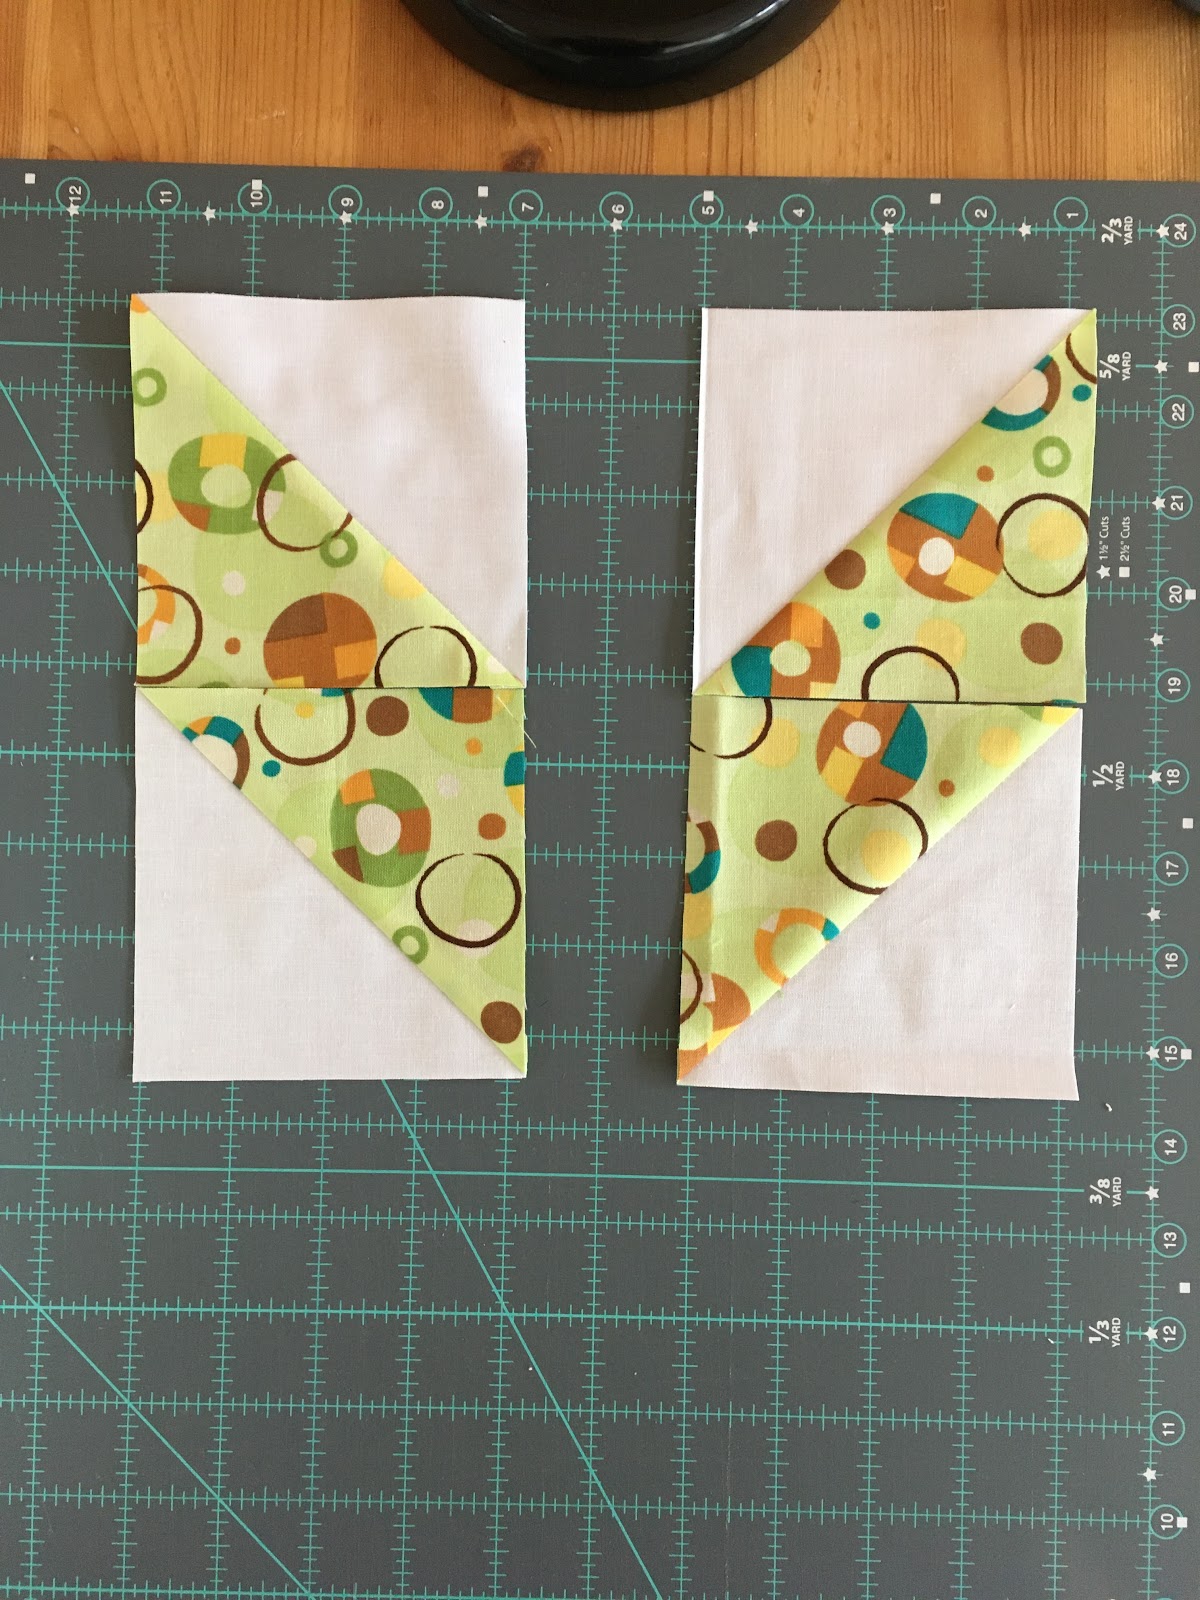
Sew and press.

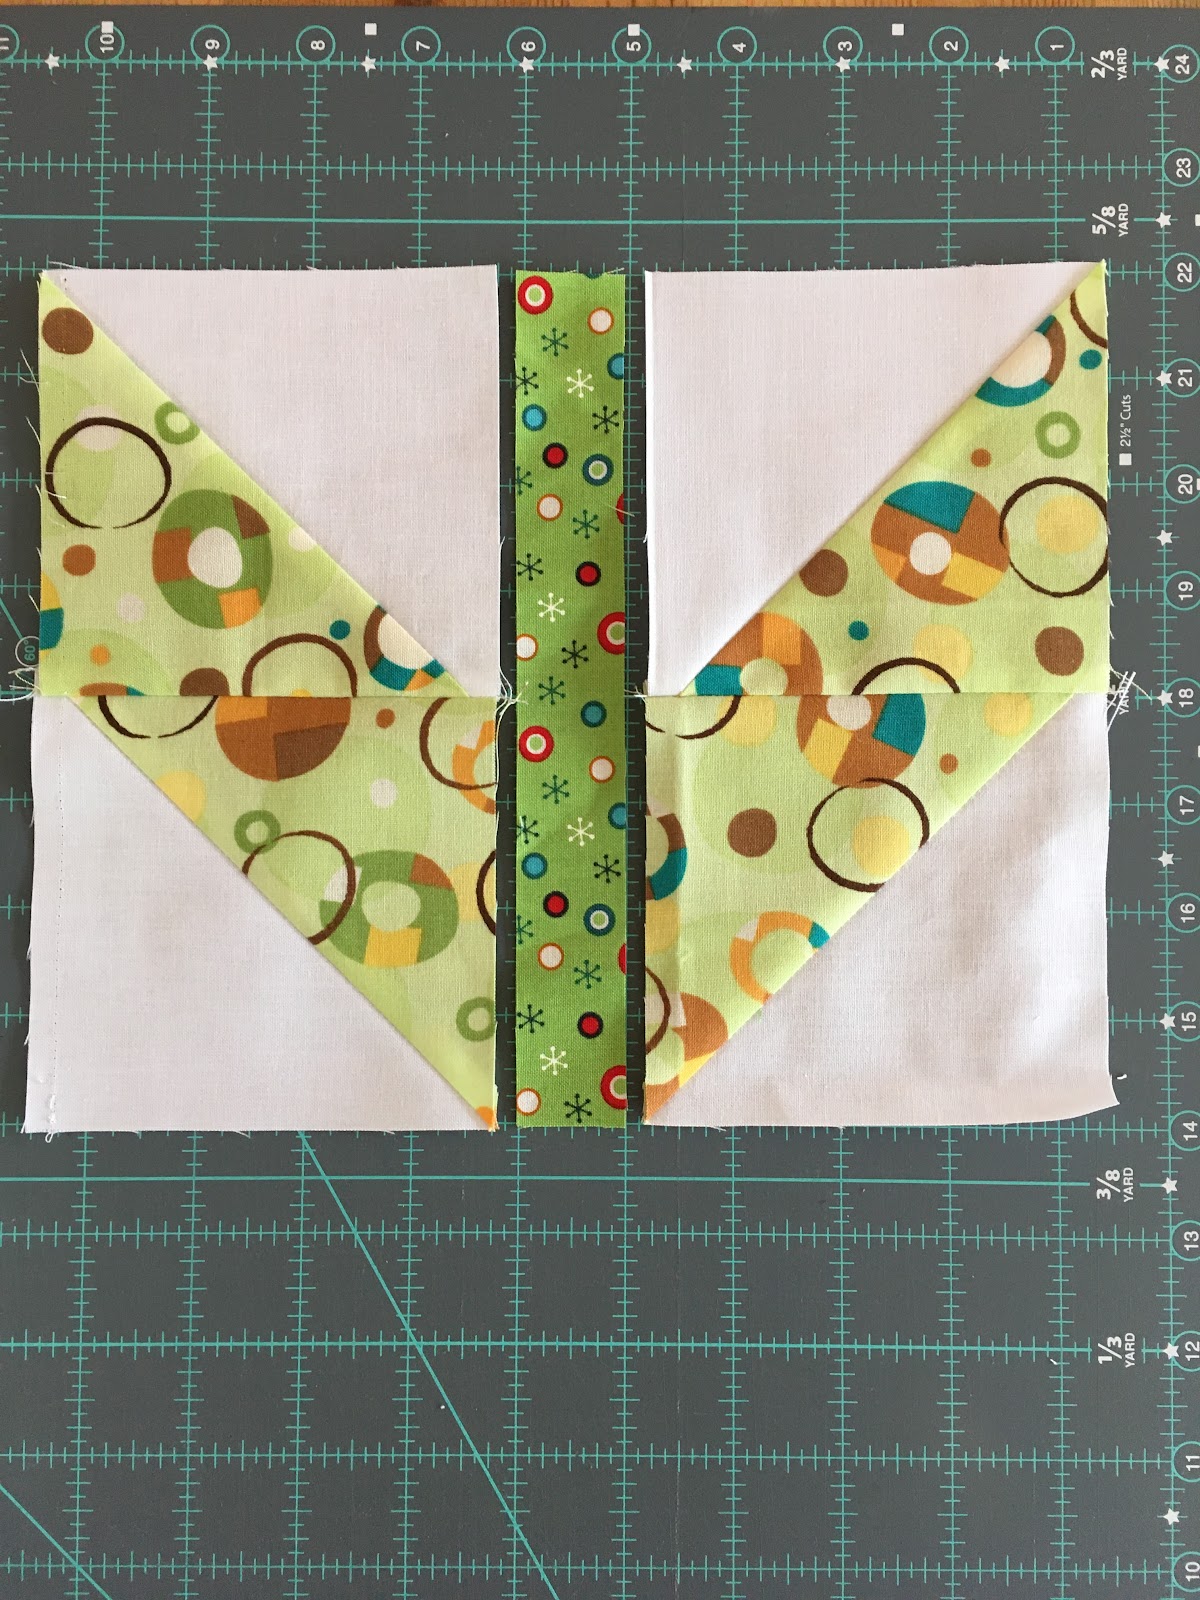
Sew Left and Right Leaf blocks to Stem and press. 

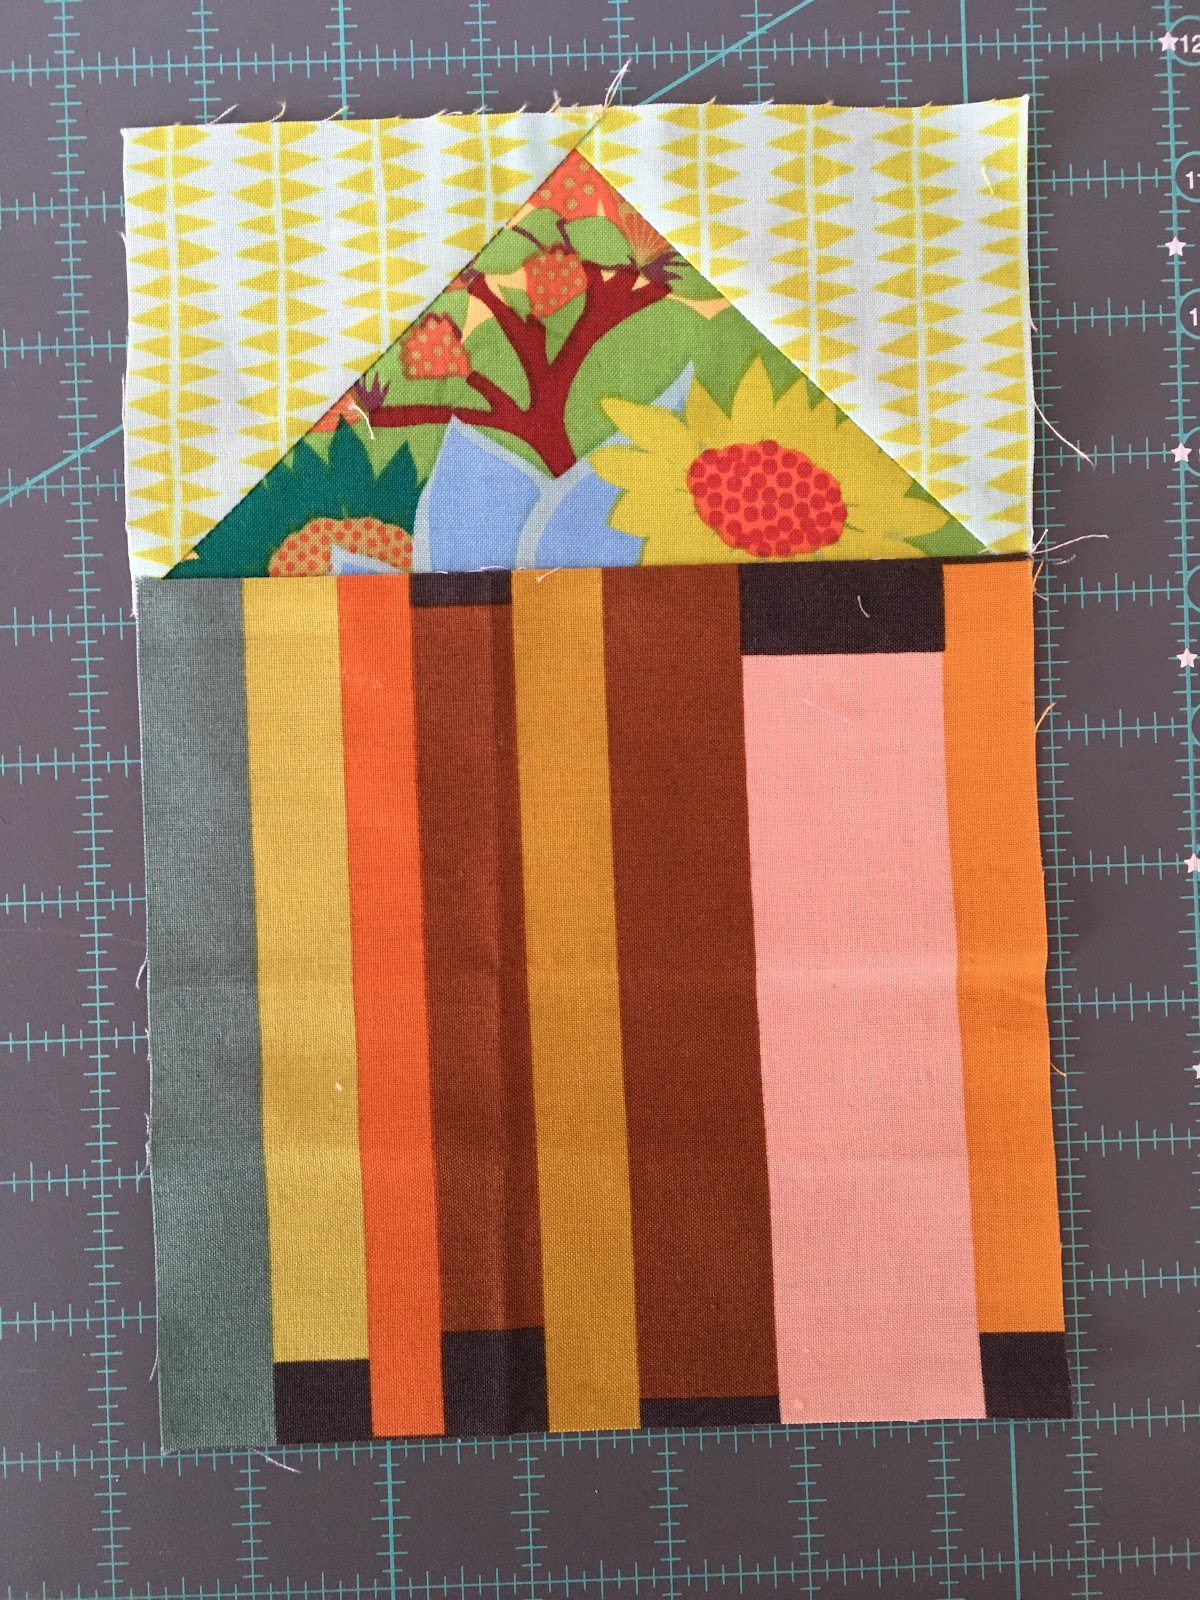
6. Sew Leaf & Stem Block to Tulip block and press. 

Your giant tulip block is done!  It should measure 8.5”x16”.

Monday 25 March 2024

March Block of the Month

 Little Houses

This month we continue our 10th anniversary festivities by sewing house blocks - because it takes a village to sustain a quilt guild for a decade.  

My inspiration is the Global Village Quilt from Gwen Marston’s book “A Common Thread”.  Made up of house blocks sewn in a riot of different colours and prints, they come together to create an eye-catching quilt. 


Fabric requirements

You will need four different prints for the house block.  No solids please.  Bold, colourful prints are encouraged!


From house print cut:  

1 - 6.5” square

From the roof print cut:  

1- 3.5”x 6.5” rectangle

From the background/sky print cut: 

2 - 3.5” squares

2 - 2.5”x 9.5” rectangles

From the ground print cut:

1 - 1.5”x 10.5” strip


Assembly (use a ¼” seam throughout unless otherwise noted)

  1. On the wrong side of each 3.5” square, mark a diagonal line from corner to corner.

  1. Place a 3.5” square on the 3.5” x 6.5” rectangle right sides together, as shown below. 

  1. Sew on the diagonal line. Trim the corner leaving 1/4”, and press the seam towards the corner. 

Repeat on the opposite side of the rectangle with the remaining 3.5” square as shown below. 

Roof unit is now complete.

  1. Sew the roof to the 6.5” square.  Press seam.  

House unit is complete.

  1. Sew a 2.5”x 9.5” background piece to each side of house unit.  Press seams.

  1. Sew 1.5”x 10.5” ground strip to bottom of unit.  Press seam.

The Little House Block is now complete!  Unfinished, it should measure 10.5”x 10.5”.


Monday 26 February 2024

February Block of the Month

 Number 10

This month we tackle the number 10.  Inspired by last month’s program on colour presented by Tara Faughnan, we will use only solids.  Also inspired by Tara, I’ve chosen a colour that I’m not drawn to and rarely use for the background - brown.  This block finishes at 10” square.

Fabric requirements

Background - any shade of brown solid

Contrast - any solid of your choice

From the brown background cut:

1 - 3.75” x 6”

3 - 1.25” x 9”

2 - 1.25” x 10.5”

From the contrasting solid cut:

2 - 2” x 6”

2 - 2” x 6.75”

1 - 2” x 9”

Assembly:

Use a ¼” seam throughout.  

  1.  Sew the 2”x6” contrasting solid strips to either side of the 3.75”x6” brown piece.  Press.

  1. Sew 2”x6.75” contrasting strips to top and bottom of the pieced unit.  Press.

  1. Sew one 1.25”x9” brown strip to one side of the assembled unit.  Press.

  1. Sew 2”x9” contrasting strip to unit, as shown.  Press.

  1. Sew the remaining 1.25”x9” brown strips to either side of the unit as shown.  Press.

  1. Sew the 1.25”x10.5” brown strips to the top and bottom of the unit.  Press.

You are done!  Block should measure 10.5” square.